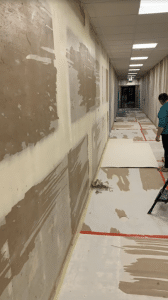
At Utah Drywall Repair, we understand that accidents happen. Whether it’s a doorknob-sized dent or a larger mishap, your once-flawless wall can quickly turn into an eyesore. But fear not! Our experts are here to guide you through the art of drywall repair, transforming imperfections into a seamless surface that seamlessly blends into your space. In this comprehensive guide, we’ll walk you through the step-by-step process of achieving an effective drywall repair that leaves your walls looking as good as new.
Contents
The Importance of a Flawless Wall
Your walls are more than just barriers; they are the backdrop of your life. A smooth, flawless wall elevates the aesthetics of your home and contributes to its overall atmosphere. At Utah Drywall Repair, we recognize the value of a pristine wall, and we’re here to empower you with the skills to repair it effectively.
Assessment and Preparation: Understanding the Damage
Before diving into the repair process, it’s crucial to assess the extent of the damage. Minor dents and holes caused by nails or screws can often be fixed with DIY techniques. However, larger damage from water leaks or impacts may require professional attention. Once you’ve determined the scale of the issue, gather the necessary tools and materials to proceed.
Patchwork Perfection: Steps for Seamless Repair
- Clean and Clear: Remove any debris or loose drywall particles from the damaged area.
- Shape the Hole: Use a utility knife to create a clean, geometric shape around the damaged section. This will make it easier to fit a patch.
- Apply the Patch: Whether you’re using a pre-made patch or creating your own, fit it into the hole and secure it with joint compound. Smooth the compound over the patch and let it dry.
- Layering and Sanding: Apply multiple layers of joint compound, allowing each layer to dry and sanding it smooth before adding the next.
- Texture Matching: If your wall has a specific texture, recreate it by using tools or techniques that mimic the original pattern.
- Prime and Paint: Apply a primer to the repaired area to ensure an even surface, then paint to match the rest of the wall.
Sealing the Deal: Sanding and Priming
Sanding is the final touch that ensures your repaired section is seamlessly integrated with the rest of the wall. Smooth out any imperfections and rough spots for a flawless finish. Once the surface is perfectly even, apply a primer before painting to achieve a consistent color and texture.
FAQ Section
Q: Can I repair small holes in drywall myself? A: Absolutely! Small holes from nails or screws can be easily repaired using DIY techniques.
Q: How do I know if the damage requires professional repair? A: If the damage is extensive, caused by water, or beyond your comfort level, it’s best to call in professionals like Utah Drywall Repair.
Q: What tools do I need for DIY drywall repair? A: You’ll need a utility knife, joint compound, a putty knife, sandpaper, and paint supplies for starters.
Q: Is painting necessary after drywall repair? A: Yes, painting is recommended to ensure a uniform appearance across the wall.
Q: Why should I consider hiring Utah Drywall Repair for larger damage? A: For significant damage, our experts have the experience and tools to ensure a seamless and lasting repair that matches your existing wall texture and color.
Ready to Transform Your Walls? Contact Utah Drywall Repair!
If you’re ready to bid farewell to unsightly holes and dents, Utah Drywall Repair is your partner in achieving wall perfection. Our experts combine skill, precision, and years of experience to deliver repairs that seamlessly blend into your living spaces. To request our services, give us a call at 801-406-6350 or visit our website. Let’s bring your walls back to life!


