Drywall installation is a crucial step in creating a beautiful and functional space. However, it’s not uncommon for mistakes to occur during the process, leading to subpar results and unnecessary expenses. At Utah Drywall and Repair, we understand the importance of flawless drywall installation, and we’re here to help you avoid common pitfalls. In this blog post, we will explore the top 10 mistakes to avoid in drywall installation, providing valuable insights and expert tips to ensure a successful project.
Contents
- 1 Mistake #1: Poor Planning and Measurement
- 2 Mistake #2: Inadequate Stud Finding
- 3 Mistake #3: Incorrect Joint Taping
- 4 Mistake #4: Insufficient Screw Placement
- 5 Mistake #5: Overlooking Electrical Outlets
- 6 Mistake #6: Ignoring Drywall Seams
- 7 Mistake #7: Neglecting Corner Bead Installation
- 8 Mistake #8: Improper Sanding and Finishing
- 9 Mistake #9: Lack of Primer Application
- 10 Mistake #10: Rushing the Paint Job
- 11 FAQ
- 12 Conclusion
Mistake #1: Poor Planning and Measurement
Before starting any drywall installation project, meticulous planning and accurate measurements are essential. Failing to measure correctly can result in ill-fitting or unevenly spaced panels, leading to visible seams and a compromised finish. To avoid this mistake, take the time to carefully measure the dimensions of the walls and ceilings, allowing for adjustments around doors, windows, and corners. Our team at Utah Drywall and Repair can assist you in creating an accurate plan for your project.
Mistake #2: Inadequate Stud Finding
Securing drywall to the underlying studs is crucial for stability and durability. One common mistake is failing to locate the studs properly, resulting in weak attachment points and the risk of sagging or crumbling drywall. Utilize a stud finder tool or consult a professional to ensure accurate stud placement. By doing so, you’ll create a solid foundation for your drywall installation.
Mistake #3: Incorrect Joint Taping
The joint tape is a critical component for achieving seamless drywall surfaces. Applying the tape incorrectly or using the wrong techniques can lead to visible cracks and an unprofessional appearance. To avoid this mistake, follow proper joint taping practices. Begin by applying a thin layer of joint compound, pressing the tape firmly into place, and then applying another layer of compound over the tape. Smooth and feather the edges to achieve a seamless finish.
Mistake #4: Insufficient Screw Placement
Improper screw placement can compromise the structural integrity of your drywall. Placing screws too close to the edges or too far apart can result in loose panels or visible screw dimples. Aim to install screws every 12 to 16 inches along the studs, ensuring a secure attachment without causing damage to the drywall. Our team of professionals at Utah Drywall and Repair has the expertise to handle precise screw placement for optimal results.
Mistake #5: Overlooking Electrical Outlets
Neglecting to account for electrical outlets and switches during drywall installation can lead to costly and time-consuming mistakes. Ensure that you accurately mark the positions of electrical boxes on the drywall sheets before cutting and installing them. It’s essential to have the necessary openings to accommodate electrical connections without damaging the drywall. By planning ahead, you’ll avoid the headache of retrofitting later on.
Mistake #6: Ignoring Drywall Seams
Seams are an inevitable part of drywall installation, but they should be virtually invisible when properly executed. Many DIY enthusiasts overlook the importance of seam preparation, resulting in noticeable and unsightly seams. To achieve a seamless finish, apply a thin layer of joint compound over the seams, feathering the edges with a taping knife. Sand the area to achieve a smooth surface before priming and painting.
Mistake #7: Neglecting Corner Bead Installation
Corner beads play a crucial role in protecting and reinforcing the vulnerable corners of your drywall. Failing to install corner beads correctly can result in chipped corners and weakened structural integrity. When installing corner beads, ensure they are straight, securely attached, and properly aligned. Our team at Utah Drywall and Repair has the expertise to install corner beads flawlessly, ensuring long-lasting durability.
Mistake #8: Improper Sanding and Finishing
Proper sanding and finishing are essential for achieving a polished and professional look. Rushing through this step or neglecting it entirely can leave rough surfaces, visible imperfections, and an unrefined appearance. Take the time to sand the joints and seams until they are smooth and seamless. Applying multiple layers of joint compound, followed by thorough sanding and priming, will result in a flawless finish.
Mistake #9: Lack of Primer Application
Priming the drywall before painting is often overlooked but is a crucial step for optimal paint adhesion and coverage. Without primer, the paint may appear uneven, and additional coats may be required, leading to unnecessary time and expenses. Apply a coat of primer to the drywall surface, allowing it to dry thoroughly before applying the paint color of your choice. This step will ensure a vibrant and long-lasting paint finish.
Mistake #10: Rushing the Paint Job
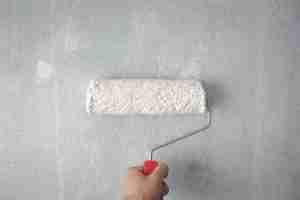
The final mistake to avoid is rushing through the paint job. Applying paint without proper preparation, such as cleaning the surface or using high-quality tools, can result in uneven coverage, streaks, and a subpar end result. Take your time to prepare the surface, choose the right paint and brushes, and apply the paint evenly. The patience and attention to detail will be rewarded with a beautiful and professional-looking finish.
FAQ
Q1: Can I install drywall on my own, or should I hire a professional? Installing drywall requires a certain level of skill and expertise. While some DIY enthusiasts may choose to tackle the project themselves, it’s advisable to hire a professional for optimal results, especially for larger or more complex projects. At Utah Drywall and Repair, we have the experience and knowledge to ensure your drywall installation is done right the first time.
Q2: How long does it take to complete a drywall installation project? The duration of a drywall installation project depends on various factors, including the size of the area, the complexity of the project, and the number of professionals working on it. A small room or repair job may take a day or two, while larger projects can span several days or weeks. Contact Utah Drywall and Repair for a personalized estimate based on your specific needs.
Q3: What type of drywall should I use for my project? The type of drywall you should use depends on the intended application and the environment in which it will be installed. Common types include standard drywall, moisture-resistant drywall for bathrooms and kitchens, fire-resistant drywall for areas requiring enhanced fire protection, and soundproof drywall for noise reduction. Our team at Utah Drywall and Repair can help you determine the best type of drywall for your project.
Q4: How do I repair damaged drywall? Repairing damaged drywall can be a complex process. Minor issues such as small holes or cracks can be fixed with patching compound or joint compound. However, larger or more extensive damage may require cutting out the damaged section and replacing it with a new piece of drywall. For professional drywall repairs, contact Utah Drywall and Repair for expert assistance.
Q5: How can I maintain and care for my drywall? To maintain your drywall’s appearance and longevity, it’s important to avoid excessive moisture, impacts, and rough handling. Regularly inspect the walls for any signs of damage or wear and promptly address any issues. Avoid hanging heavy objects without proper support and be cautious when moving furniture or other items near the walls. With proper care, your drywall will remain in excellent condition for years to come.
Conclusion
In conclusion, avoiding common mistakes in drywall installation is essential for achieving a flawless and visually appealing result. By following the tips provided in this article and enlisting the help of professionals like Utah Drywall and Repair, you can ensure a successful drywall installation project. Remember to plan meticulously, measure accurately, locate studs properly, pay attention to joint taping and corner bead installation, and take the time to sand, prime, and paint with care. For all your drywall installation and repair needs, contact Utah Drywall and Repair at 801-406-6350 or visit our website here. Let us help you create the perfect walls for your space!


