Thinking of getting a home makeover?
One of the best ways to begin is by redoing the walls of your house. Do those walls have unsightly cracks and chipped paint? Start afresh by repairing them and getting a brand new paint job to change the whole look of the room.
But before you paint the old walls, you need to sand the surface to even it out.
Drywall sanding isn’t most people’s idea of a fun do-it-yourself project. It’s a messy, dusty and time-consuming task. And if you don’t do it properly, your wall will look unfinished and shoddy once it is painted.
But for DIY enthusiasts, no challenge is too big. If you’re thinking of taking your drywall project into your own hands, here are some tips on sanding drywall effectively.
Contents
Guide to Drywall Sanding
Tools You Need to Sand Drywall
- Putty knife
- Hand sander
- Sanding pole
- Rotary sander
- Sanding sponge
- Sandpaper
- Handheld light
- Goggles
- Dust mask
Drywall Sanding Technique
The main tools you’ll be using will be the hand sander with fine grit precut sandpaper attached. Go for a 120 or 150-grit sandpaper for the best results. If the walls are high, a sanding pole will come in handy.
However, you need to be extra careful when using a sanding pole. It needs to be balanced precisely otherwise it will flip over during the sanding and ruin the surrounding drywall. For those pesky corners, a sanding sponge will do the job efficiently.
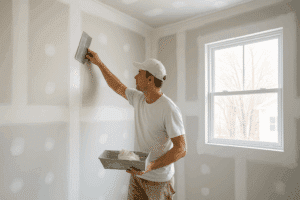
Start by using the hand sander lightly along the edges and ridges. Do not sand them excessively. Then move on to the main areas. Keep the hand sander angled slightly. Remember not to sand in a straight line but rather move the hand sander in strokes as you sand.
If you come across gouges, don’t sand them. Fill them up later with joint compound. To get the corners properly, switch to a sanding sponge. The finer the sponge, the better. A hand sander or rotary sander can gouge the opposing wall and prolong your task.
Don’t scrub excessively or sand over a spot more than once. Once you’re finished, get a handheld light and go over the wall surfaces. Mark any blemishes or imperfect areas, apply a joint compound over them and sand them again.
Tips on Controlling Dust During Sanding
Drywall sanding creates a huge amount of chalky white dust that can permeate the whole house. This is why it’s a task best left to professionals.
Some people attempt wet drywall sanding to avoid dust. It involves using a damp sponge to get the job done instead of sandpaper. Though this can be helpful, it’ll still create a moderate amount of dust that settles on the floor.
The best you can do is wear protective eye goggles and a dust mask while sanding and keep the windows open.
Summary:
In order to redo the walls of your home, you need to sand them first. Drywall sanding is a tedious process that requires a lot of precision and creates a mess. For proper sanding of drywalls, hire a professional.


