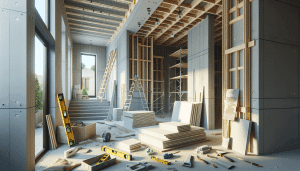
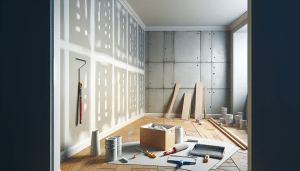
Welcome to Utah Drywall & Repair‘s step-by-step tutorial on DIY plasterboard fixing! We know that wear and tear on your plasterboard can be a common issue for homeowners, leaving you in need of guidance. Whether it’s cracks, holes, or general blemishes, this blog post will help you tackle those imperfections with confidence. We’re here to guide you through every step, ensuring your walls look flawless once again.
Contents
Understanding Plasterboard Basics
Before diving into the world of DIY plasterboard repair, it’s essential to understand the basics of the material. Plasterboard, also known as drywall, is a popular choice for modern homes due to its ease of installation and smooth finish. Although durable, it isn’t immune to damage, which may occur due to various reasons like furniture mishaps or general aging.
As a homeowner, recognizing the signs of plasterboard damage is crucial. Look out for dents, cracks, and holes. Minor imperfections can develop into more significant issues if left untreated. Understanding these nuisances sets the foundation for undertaking repairs with confidence.
Gathering the Right Tools and Materials
An effective repair process begins with having the right tools and materials at hand. This not only saves time but also ensures a smoother workflow. At Utah Drywall & Repair, we recommend making a checklist of all essentials before hitting the local hardware store.
A basic toolkit should include a utility knife, sandpaper, a putty knife, plasterboard patches, joint compound, and a drill. Furthermore, having safety gear like gloves and goggles is a wise choice to protect yourself while working on the repairs.
Identifying the Issue
Once you’ve gathered the necessary tools, it’s time to examine the damage. Identify whether you’re dealing with minor cracks, small holes, or larger damages. Knowing the nature of the problem helps you choose the appropriate repair technique.
For instance, hairline cracks may only require a quick patch job, whereas larger holes need more attention and possibly some additional supportive materials. Proper identification of the issue at hand determines the depth of your repair plan.
Preparing the Area
Preparation is key in DIY repairs. Start by cleaning the damaged area to remove dust and debris. Use a damp cloth or sponge to gently wipe over the surface and ensure it’s dry before continuing.
Nex, protect your work area by covering furniture and floors with a drop cloth or old sheet. This protective layer will catch any falling debris or stray materials, keeping your home clean and tidy throughout the process.
Repairing Small Holes
Small holes are a common issue in plasterboard and, fortunately, they are quite easy to fix. Start by using your utility knife to cut a small square around the hole, making it uniform in shape.
Once your square is cut, place the plasterboard patch over the opening and secure it using Screws or adhesives. Apply a layer of joint compound over the patch, feathering out the edges to blend seamlessly with the surrounding surface.
Fixing Cracks
Cracks vary in their severity, but even the slightest imperfection requires attention to prevent worsening damage. Use your utility knife to widen the crack slightly, creating a V-shape for better compound adhesion.
Fill the crack with joint compound, pressing firmly to ensure it fully covers the gap. Smooth out the compound using a putty knife and leave it to dry. Once dry, sand the area gently to achieve a flush and flawless finish.
Handling Large Damages
Tackling large damages can be daunting, but with the right approach, it’s entirely manageable. Start by assessing what new plasterboard sections you may need to cut and fit for your repair.
After cutting the necessary sections, align them with the damage and secure them in place, applying joint compound over the seams. Feather out the compound to blend with the existing wall and sand smooth once dry.
Ensuring a Seamless Finish
The secret to a successful repair often lies in the finishing touches. Once your compound is dry and surfaces are sanded, you’re ready to paint. Make sure to match the color precisely or repaint the entire wall for uniformity.
For impeccable results, apply at least two coats of paint, allowing each coat to dry completely before applying the next. This prevents unwanted streaks and enhances the overall appearance of your repair work.
Preventive Maintenance Tips
- Regular Inspections: Check your walls routinely to catch and address minor damages early.
- Avoid Moisture: Keep your home well-ventilated to prevent humidity and moisture from weakening your plasterboard.
- Shield High Traffic Areas: Use protective barriers or furniture arrangements to safeguard walls in busy rooms.
- Secure Fixtures Properly: Ensure wall fixtures are adequately supported to prevent damage from excess weight or movement.
- Educate Household Members: Inform all residents on the importance of careful wall handling.
When to Call in the Experts
While DIY repairs can be satisfying, there come moments when professional assistance is necessary. For persistent issues or uniquely challenging spots, a handyman’s expertise proves invaluable.
Utah Drywall & Repair boasts the right skills and tools for any plasterboard problem. Our professionals ensure quality and efficient work, sparing you the stress and potentially higher costs of unsuccessful DIY attempts.
Wrapping Up Your DIY Project
Congratulations on taking the initiative to repair your plasterboard and enhance your living environment! We hope our guide has empowered you with the confidence to approach such tasks independently. Remember, practice makes perfect!
If you encounter any challenges or need guidance, feel free to reach out to Utah Drywall & Repair by calling 801-406-6350 or Request a Free Quote. We’re here to assist you every step of the way.


