Welcome to Utah Drywall and Repair’s guide to mastering the art of drywall patching. Whether you’ve accidentally put a hole in your wall or you’re dealing with the aftermath of a renovation project, we’ve got you covered. Drywall patching might seem intimidating, but with the right techniques and some expert advice, you can achieve seamless repairs that make your walls look as good as new.
Contents
Introduction
At Utah Drywall and Repair, we understand that accidents happen, and walls can get damaged over time. That’s why we’ve created this comprehensive guide to help you become a drywall patching pro. Whether you’re a DIY enthusiast or a homeowner looking to save on repair costs, our step-by-step instructions will ensure your repairs are seamless and long-lasting.
Assessing the Damage
The first step in any drywall patching project is assessing the extent of the damage. Understanding the size and severity of the hole or imperfection will guide you in selecting the appropriate patching technique.
Gathering Your Tools and Materials
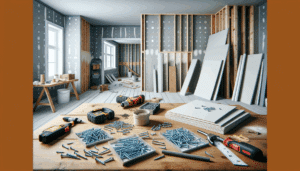
Before you start patching, make sure you have the necessary tools and materials on hand. Here’s a list of what you’ll need:
- Joint compound
- Spackling paste
- Self-adhesive mesh patch
- Putty knife
- Sandpaper (medium and fine grit)
- Primer
- Paint
- Safety gear (goggles, gloves, mask)
- Drop cloths
Preparing the Area
To avoid making a mess and to ensure a clean repair, prepare the area around the damaged spot. Remove any loose or damaged material, and cover the floor with a drop cloth to catch dust and debris.
Patching Techniques
Small Holes and Nicks
For small holes and nicks, spackling paste is your best friend. Apply a thin layer of spackling paste using a putty knife, feathering the edges to blend it seamlessly with the surrounding wall.
Medium-Sized Holes
Medium-sized holes can be repaired using a self-adhesive mesh patch. Apply a layer of joint compound over the patch, feathering the edges, and allow it to dry.
Large Holes and Gashes
For larger holes and gashes, you may need to use a combination of joint compound and a patching material. Layer the joint compound and patch material until the hole is filled, allowing each layer to dry before adding the next.
Sanding and Smoothing
Once your patch is dry, sand the area to create a smooth and even surface. Start with medium-grit sandpaper and finish with fine-grit sandpaper for a seamless finish.
Priming and Painting
Before you can consider your repair complete, apply a primer to the patched area to ensure the paint adheres evenly. Once the primer is dry, you can paint over the patch to match the surrounding wall.
FAQs
What causes holes and damage to drywall?
Drywall can be damaged by accidental impacts, water leaks, or even simple wear and tear over time.
Can I patch drywall without professional help?
Absolutely! With the right tools and techniques, many drywall repairs can be successfully completed by homeowners.
What’s the difference between spackling and joint compound?
Spackling is best for small repairs and dries quickly, while joint compound is better suited for larger repairs and requires more drying time.
How long does it take for patching to dry?
Drying times can vary based on the patching material and environmental conditions, but it’s generally recommended to allow 24 hours for complete drying.
Can I paint over the patched area immediately?
It’s best to wait until the patching material is completely dry and you’ve applied primer before painting for the best results.
Now that you’ve learned the art of drywall patching, you can tackle those unsightly holes and imperfections with confidence. For expert advice, high-quality materials, and professional service, contact us at 801-406-6350 or visit our website drywallrepairutah.com. Say goodbye to wall blemishes and hello to flawless walls!


