Welcome to the ultimate guide to flawless drywall finishing brought to you by Utah Drywall & Repair. Many homeowners struggle with achieving a perfect drywall finish, leading to frustration and less-than-ideal results. This comprehensive guide aims to solve that problem by offering expert advice and techniques for a smooth and professional-looking finish. Whether you’re a DIY enthusiast or seeking to understand the work being done in your home, this article will be your go-to resource.
Contents
Understanding the Basics of Drywall
Before diving into the finishing process, it’s essential to understand what drywall is and why it’s widely used in homes. Drywall, also known as gypsum board, has become the industry standard for constructing interior walls and ceilings due to its durability and cost-effectiveness. It consists of a gypsum core encased in paper, creating a smooth and uniform surface ideal for finishing.
Knowing the basics will help you appreciate the techniques and processes involved in achieving a flawless finish. So, let’s get started and make sure you have all the foundational knowledge you need.
Gather Your Materials
Preparation is key to a successful drywall finishing project. You’ll need the right materials to get started. Here’s what you should have on hand:
- Drywall compound: This is used for filling joints and smoothing surfaces.
- Drywall Tape: This reinforces the seams between drywall sheets.
- Taping knife: Essential for applying and smoothing the compound.
- Sanding block: For smoothing out any imperfections after the compound dries.
- Primer: To prepare the wall for Painting.
Make sure all your tools and materials are within reach to make the job as seamless as possible.
Prepping the Drywall
Preparation doesn’t stop at gathering materials. Prepping your drywall is equally crucial. Start by inspecting the drywall for any damages. Repair any dents or holes to ensure a smooth surface. Use a utility knife to clean up any rough edges around the repairs.
Dust and debris can interfere with the finishing process. Clean the drywall surface thoroughly, removing all dust using a dry cloth. This will help the compound adhere better, leading to a more flawless finish.
Applying the Tape
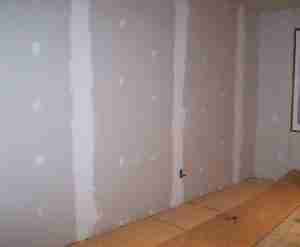
Taping is a pivotal step in drywall finishing. It reinforces the joints and helps create a seamless surface. Begin by applying a thin layer of the drywall compound over the seams. This acts as a base layer for the tape.
Next, apply the drywall tape over the compound. Use a taping knife to press the tape firmly into the compound, smoothing out any air bubbles. Ensuring the tape is flat and well-adhered is essential for the upcoming layers of compound.
First Coat of Compound
Once the tape is in place, it’s time for the first coat of compound. Apply a generous amount of compound over the tape using your taping knife. Spread it evenly, feathering out the edges to blend with the drywall.
This initial coat is crucial for building a smooth and even surface. Allow it to dry completely before proceeding to the next step. Drying times can vary, so make sure to follow the compound manufacturer’s guidelines.
Subsequent Coats of Compound
Achieving a flawless finish often requires multiple coats of compound. After the first coat has dried, sand it lightly to remove any imperfections. Wipe away the dust before applying the second coat.
Apply the second coat using the same technique, but extend the application area slightly past the first coat’s edges. This helps in creating a seamless transition. Allow this second coat to dry, then apply a third if necessary.
Sanding the Surface
Sanding is the final touch that can make or break your drywall finish. Begin with a medium-grit sanding block to smooth out the compound. Focus on achieving a level surface, removing any ridges or bumps.
After achieving a level surface, switch to a fine-grit sanding block for a final pass. This will leave your drywall smooth and ready for priming. Remember, wear a dust mask to protect yourself from the fine particles.
Priming the Drywall
Priming prepares your drywall for the final paint coat and helps in masking any minor imperfections. Choose a high-quality primer that suits your wall type. Apply the primer using a roller for large areas and a brush for edges and corners.
Allow the primer to dry completely. This step not only improves paint adhesion but also enhances the overall finish quality. A well-primed wall will make the eventual paint coat look fabulous.
Painting the Drywall
With the wall primed, you’re ready for the final paint coat. Select a high-quality interior paint that complements your home décor. Start by painting the edges and corners with a brush, then use a roller for larger areas.
Apply at least two coats of paint for even coverage and a professional look. Let each coat dry thoroughly before applying the next. Once done, you’ll have a beautifully finished wall that adds elegance to your space.
Common Mistakes to Avoid
Even the most experienced DIYers can make mistakes. Here are some common pitfalls to avoid:
- Skipping surface preparation: Always clean and repair the drywall before starting.
- Using too much compound: Overloading leads to more work sanding and can create ridges.
- Neglecting to sand between coats: Each layer should be smooth before the next is applied.
- Rushing through drying times: Allow each coat to dry fully to avoid compromising the finish.
- Not using primer: This is crucial for paint adhesion and final finish quality.
Avoiding these mistakes will make your drywall finishing project much more successful.
Conclusion
Follow these steps, and you’ll be well on your way to achieving a flawless drywall finish. Whether doing it yourself or simply understanding the process, you now have the knowledge to ensure great results. Feel free to Contact Us by phone # 801-406-6350 or Request a Free Quote.


