At Utah Drywall & Repair, we know how frustrating it can be when plasterboard gets damaged, whether it’s from a door slam or an unexpected mishap. That’s why we’ve put together this detailed guide to help you fix plasterboard issues like a pro. If you live in the Salt Lake, Davis, or Utah County areas, this tutorial is designed especially for you. Follow our expert tips, and you’ll have your walls looking as good as new in no time.
Contents
1. Assess the Damage
Before diving into the repair project, it’s important to assess the extent of the damage. This will give you a clear idea of the tools and materials you’ll need to get the job done.
If the damage is minor, like small holes or cracks, you’ll find the repair process to be fairly straightforward. However, for larger holes or extensive damage, you might need additional supplies and a bit more time. Remember, assessing the damage accurately will set the stage for a successful repair job.
2. Gather Your Tools and Materials
To fix plasterboard effectively, having the right tools and materials is crucial. Here’s a list of what you might need:
- Utility knife: Sharp enough to cut through plasterboard.
- Plasterboard patch: For larger holes.
- Joint compound: Helps to seal the damaged area seamlessly.
- Sandpaper: To smooth out the surface once the patch is applied.
- Paint and primer: To finish and blend the repair with the rest of the wall.
3. Cut Out the Damaged Area
Next, it’s time to cut out the damaged portion of the plasterboard. This step ensures that you’re working with a clean, even surface.
Use a utility knife to carefully cut along the outline of the damaged area. Make sure the cutout is square or rectangular; this will make it easier to fit and secure your plasterboard patch. Be cautious and take your time to avoid extending the damage further.
4. Prepare the Plasterboard Patch
Now that you’ve removed the damaged section, it’s time to prepare your plasterboard patch.
If you have a pre-made patch, great! Simply trim it to fit the hole snugly. If you’re cutting a patch from a larger piece of plasterboard, measure carefully and cut with precision to ensure a perfect fit. The key here is to make sure the patch aligns seamlessly with the surrounding area.
5. Attach the Patch
Attaching the patch is a crucial step in the repair process. You’ll need to make sure it’s secure and flush with the existing wall.
First, place the patch into the hole and hold it securely. Then, use plasterboard Screws or adhesive to secure it in place. Make sure the patch is level with the wall surface, as any unevenness will show once you apply joint compound and paint.
6. Apply Joint Compound
With your patch securely in place, it’s time to break out the joint compound. This step involves covering the patch and blending it with the surrounding area.
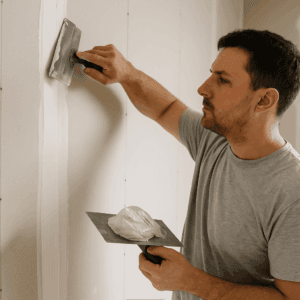
Apply a thin layer of joint compound over the seams of the patch using a plasterboard knife. Feather the edges to blend seamlessly with the wall. Allow the compound to dry completely before moving on to the next step.
7. Sand for a Smooth Finish
Once the joint compound has dried, it’s important to sand the area to ensure a smooth, professional finish.
Use fine-grit sandpaper to gently sand the patched area, focusing on blending the edges with the rest of the wall. Be careful not to over-sand, as this can create an uneven surface. Take your time to get it just right, ensuring there are no visible bumps or ridges.
8. Prime the Area
After Sanding, the next step is to apply a primer. This prepares the surface for Painting and helps ensure an even color.
Choose a primer that matches your wall type and apply a coat over the patched area using a brush or roller. Allow the primer to dry thoroughly before applying paint. Priming is essential, especially if you want to achieve a flawless finish.
9. Paint to Match
Now it’s time to bring it all together with a fresh coat of paint.
Select a paint color that matches your existing wall. Apply one or two coats as needed to blend the repaired area seamlessly with the rest of the wall. Use smooth, even brush strokes or a roller for the best results. Once dried, your wall should look as good as new.
10. Inspect and Touch Up
Finally, inspect your work for any imperfections that need touching up.
Take a close look at the repaired area to ensure it’s fully blended with the wall. If you spot any flaws, use a small amount of joint compound and sandpaper to smooth them out. A final touch-up of paint may also be necessary for a perfect finish.
At Utah Drywall & Repair, we’re here to help with all your plasterboard needs. For further assistance, call us at 801-406-6350 or Request a Free Quote.


