Drywall Taping is a crucial step in ensuring your drywall projects look professional and seamless. At Utah Drywall & Repair, we understand that for beginners, this task can seem daunting. But don’t worry! This guide is here to make drywall taping easy for you. Whether you’re tackling minor repairs or a larger project, our tips will help you achieve a polished finish.
Contents
- 1 Getting Started with the Right Tools
- 2 Understanding Joint Compound
- 3 Preparing the Drywall Surface
- 4 Applying the Tape
- 5 The First Coat of Mud
- 6 Smoothing and Sanding
- 7 Applying Additional Coats
- 8 Troubleshooting Common Issues
- 9 Final Sanding and Finishing Touches
- 10 Getting Ready to Paint
- 11 Conclusion and Next Steps
Getting Started with the Right Tools
Before diving into drywall taping, it’s essential to have the right tools. The correct tools not only make the job easier but also ensure a smoother finish. You’ll need a taping knife, a mud pan, a utility knife, and drywall Tape. Remember, investing in good quality tools can significantly impact the final result.
Understanding Joint Compound
Joint compound, often known as “mud,” is crucial in drywall taping. It’s used to fill seams and cover the tape. There are ready-mixed and powdered forms. Beginners often find the ready-mixed variety easier to use. The consistency of the mud is key; it should be smooth and easy to spread, similar to peanut butter.
Preparing the Drywall Surface
Preparation is half the battle when it comes to drywall taping. Ensure all Screws and nails are securely fastened. Any protruding fasteners should be driven in slightly below the drywall surface. Wipe the dust off the drywall to ensure the tape and compound adhere properly.
Applying the Tape
With the joints prepared, it’s time to apply the tape. There are various types of drywall tape, including paper and mesh. Paper tape is more traditional, while mesh tape is self-adhesive and easier for beginners. Position the tape over the joint, ensuring it’s centered and smooth.
The First Coat of Mud
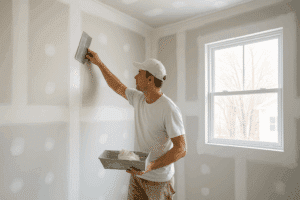
Here’s where things get exciting—applying the first coat of mud. Using your taping knife, spread the joint compound over the tape, working to cover it completely. Feather the edges to ensure it blends seamlessly with the drywall. This first coat should be thin, just enough to embed the tape.
Smoothing and Sanding
After letting the first coat dry, which can take 24 hours, it’s time to smooth and sand. Gently sand the surface to remove any rough patches or ridges. This step is crucial for a smooth finish but be careful not to sand too much and damage the tape.
Applying Additional Coats
Drywall taping requires at least three coats of mud. Each subsequent coat should be slightly wider than the last to blend the edges further. Patience is key here. Allow each coat to dry completely before applying the next one. Sand lightly between coats for the best results.
Troubleshooting Common Issues
Sometimes, things don’t go as planned. Here are some common drywall taping issues and how to fix them:
- Bubbles under the tape: Press firmly on the tape while applying mud to prevent air pockets.
- Cracks in the mud: Thicker applications can crack; apply thinner coats and build up gradually.
- Rough surfaces: Sanding between coats helps achieve a smooth finish.
- Visible tape lines: Feathering the edges of the mud blend the tape into the wall surface.
- Shrinkage: Applying mud in thin layers helps avoid shrinkage and cracking.
Final Sanding and Finishing Touches
Once the final coat is dry, it’s time for the last sanding. Use fine-grit sandpaper to achieve a smooth, even surface. After sanding, inspect the surface under good lighting to ensure there are no imperfections. Wipe down the wall to remove any dust before Painting or priming.
Getting Ready to Paint
With sanding complete, you’re almost ready to paint. Apply a drywall primer to seal the surface and ensure the paint adheres properly. Priming also helps to highlight any minor imperfections you might have missed, giving you a chance to address them before the final paint job.
Conclusion and Next Steps
Drywall taping might seem intimidating at first, but with the right tips and a little practice, you can master this skill. Now that you have the basics down, you’re ready to tackle your next drywall project with confidence! For professional help, Contact Us by phone # 801-406-6350 or Request a Free Quote.


