At Utah Drywall & Repair, we know that achieving perfectly smooth walls can be a challenge for any homeowner. Whether it’s due to damaged surfaces or simply wanting an updated look, skim coating is the solution you need. In this blog post, we’ll guide you through skim coating techniques to help you achieve smooth, professional walls in your home.
Contents
Understanding Skim Coating
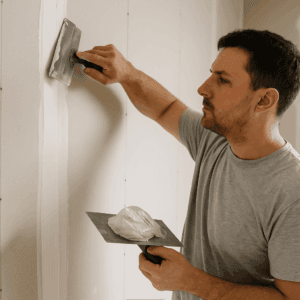
Skim coating involves applying a thin layer of joint compound over walls to create a smooth surface. It’s an essential technique for fixing imperfections, covering textured surfaces, and preparing walls for a fresh coat of paint.
We’ll walk you through each step, ensuring you understand the nuances of this technique and make your walls look flawless.
Why You Need Skim Coating
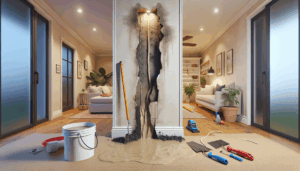
Have you ever noticed dings, dents, or rough textures on your walls? Skim coating is your best ally.
It not only hides these imperfections but also provides a perfect canvas for Painting or wallpapering. Say goodbye to annoying wall flaws and hello to a sleek, smooth finish.
Tools You Will Need
Before you start, gather these essential tools to ensure a successful skim coating project.
- Joint Compound: This is the primary material for skim coating. Choose an all-purpose type for the best results.
- Taping Knife: A wide-blade taping knife helps you spread the compound evenly across the wall.
- Sandpaper and Sponge: These are for smoothing and removing any excess compound after it dries.
- Drop Cloths: Protect your flooring and furniture from any splatters or spills.
- Mixing Tray and Drill: Use these to mix the joint compound to the right consistency.
Preparation Steps
Preparation is key to achieving a smooth skim coat. Start by clearing the area and ensuring you have adequate ventilation.
Clean the walls thoroughly to remove any dirt or grease that could affect adhesion. Don’t forget to patch any larger holes or cracks before you begin.
Mixing the Joint Compound
Next, mix your joint compound to a creamy, smooth consistency.
Use the mixing tray and drill attachment for an even mixture. This ensures that it spreads easily and adheres well to the wall surface.
Applying the First Coat
When applying the first coat, start at one corner of the wall and work your way across.
Use your taping knife to apply the compound in a thin layer. Keep your movements smooth and consistent for the best results.
Smoothing Out Imperfections
After the first coat dries, it’s time to smooth out any remaining imperfections.
Lightly sand the surface with fine sandpaper. For small details, use a damp sponge to gently remove excess compound and even out the texture.
Applying Additional Coats
For the best finish, you may need to apply two or three additional coats of compound.
Each layer should be thinner than the last to build up the surface gradually. Make sure each coat is completely dry before applying the next one.
Final Sanding
The last step in skim coating is the final sanding.
Use fine-grit sandpaper to smooth out the dried surface completely. A polished finish prepares your walls perfectly for painting or wallpapering.
Conclusion
Achieving smooth walls with skim coating can transform your home’s appearance.
If you’re ready to tackle this project, remember that Utah Drywall & Repair is here to help. Contact Us by phone at 801-406-6350 or Request a Free Quote.


