Welcome to our comprehensive guide on tackling drywall water damage like a pro! At Utah Drywall & Repair, we understand how daunting water damage can be. That’s why we’ve created this easy-to-follow DIY resource, perfect for homeowners who are ready to roll up their sleeves. By following these methods, you’ll not only restore the beauty of your walls but also maintain the integrity of your home. Let’s dive into these expert tips and tricks!
Contents
- 1 Understanding Drywall Water Damage
- 2 Gathering Your Tools and Materials
- 3 Safety First: Precautions You Should Take
- 4 Removing the Damaged Drywall
- 5 Preparing the Area for Repair
- 6 Patching the Drywall: Step by Step
- 7 Sanding for a Smooth Surface
- 8 Priming and Painting
- 9 Five Essential DIY Tips for Success
- 10 When to Call the Professionals
- 11 Ready to Fix Your Drywall?
Understanding Drywall Water Damage
To effectively tackle water damage, understanding the different types is crucial. Water damage can appear in various forms, from stains and bubbling to the more severe crumbling of material. Each type of damage reveals a little about its underlying cause. For example, bubbling may indicate water trapped beneath a painted surface. In contrast, stains could be a result of a leak that needs to be addressed. Now that we’re on the same page, we can strategize the repair process.
Taking time to understand the damage is more than just an educational exercise; it’s the foundation for effective repair. By correctly identifying the problem, you can select the right tools and techniques. This essential first step ensures you’re not just masking the damage but truly fixing it. Knowledge is power, after all!
Gathering Your Tools and Materials
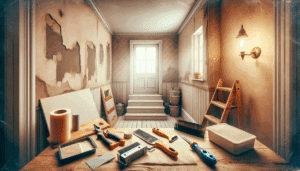
Just like any project, having the right tools is paramount. You don’t want to start repairing only to run back and forth gathering items. So, to keep things smooth, gather everything you’ll need from the outset. Basic tools for this task include a utility knife, drywall saw, and joint compound. But wait, there’s more!
Beyond the basics, a sturdy ladder, moisture-resistant drywall for replacements, and a quality primer and paint will make your job easier. Investing in these items upfront will save time and enhance the finish of your work. After all, your walls deserve the best after putting up with such rough conditions!
Safety First: Precautions You Should Take
Safety is not just a buzzword; it’s a necessity. Before diving into repairs, safeguard your wellbeing. Put on safety goggles to protect your eyes from dust and small debris. Wear gloves to avoid contact with potentially harmful substances that might irritate your skin. Our workspace should be a safe space!
In addition to personal protection, ensure good ventilation. You’ll likely use various substances like joint compound and primer. These can give off fumes not ideal for enclosed spaces. Open a window or use fans to circulate air. With safety measures in place, you can focus fully on your repair work.
Removing the Damaged Drywall
Now that you’re equipped, it’s time to remove the damaged sections. Start by marking the damaged area, being careful not to extend into healthy drywall. Use a utility knife to score along these outlines. Remember, precision is your best friend.
Carefully cut out the damaged portion with a drywall saw, keeping your lines straight and tidy. Avoid overcutting into studs or wiring. Easy does it! Removing the piece unveils more about the damage, possibly offering clues to its cause, which is crucial for preventing future issues.
Preparing the Area for Repair
After damage removal comes the essential step of preparing the work area. Start by inspecting the hole or removed area. Clear away dust, debris, and any loose material. A clean surface is vital for successful Patching and sealing.
Don’t forget to dry the area thoroughly. Mold and mildew love moist environments, and you certainly don’t want to invite them back. Ensure the space is completely dry before proceeding with repairs. Consider using a small fan or even a hairdryer for more targeted drying action.
Patching the Drywall: Step by Step
Patching is where your project transforms from destruction back to construction. First, cut a piece of new drywall to the dimensions of your removed area, ensuring a snug fit. Secure this replacement with drywall Screws into the surrounding studs.
Next, apply joint compound over the seams and screws, using a putty knife for a smooth finish. Be generous, but not excessive, with your application. Allow to dry fully. This step lays a solid foundation for your later finish work, ensuring seams are level and invisible.
Sanding for a Smooth Surface
With the joint compound dried, it’s sanding time! Use medium-grit sandpaper initially to even out joint compound inconsistencies. Always sand in a circular motion. Follow this with a finer grit for a silky-smooth surface, blending seamlessly into the existing wall.
Remember, sanding is an art of touch. Apply gentle pressure and let the paper do the work. Over-sanding can expose the underlying paper, leading to more repairs. Patience and delicacy are your allies here, helping you achieve that polished, professional finish.
Priming and Painting
You’ve made it to the finishing touch! Begin by priming the repaired area. A quality primer prevents stains and ensures an even paint coat. Allow your primer to dry thoroughly, following specific product instructions.
With the primer set, proceed to paint. Match your new paint with the existing wall color for a unified look. Use even strokes and additional coats as necessary. Let your wall sit back and look natural, as if the water damage saga was simply a dream!
Five Essential DIY Tips for Success
- Test for Moisture: Using a moisture meter, ensure the area is completely dry before beginning repairs. This avoids sealing in moisture that could lead to mold.
- Watch for Recurrence: Identify and resolve any leaks or water sources to prevent new issues.
- Invest in Quality: Choose professional-grade tools and materials. Your results will reflect the quality you begin with!
- Take Your Time: Rushed work often results in mistakes. Allow ample drying times and plan your workflow.
- Embrace Imperfections: A perfect match might not always happen. Small variations are part of a unique home story.
When to Call the Professionals
While DIY efforts can handle many repairs, some situations require professional expertise. Extensive damage, structural concerns, or hidden leaks are serious business. These scenarios demand a trained eye and skilled hand to manage safely and effectively.
At Utah Drywall & Repair, we work with homeowners facing daunting repairs, providing peace of mind with our expert Services. No challenge is too great, and we pride ourselves on delivering results that endure. Sometimes, a professional touch makes all the difference for the long haul.
Ready to Fix Your Drywall?
With these insightful tips, you’re now well-prepared to face drywall water damage repairs with confidence. Should you find yourself needing guidance or more extensive help, Contact Us at Utah Drywall & Repair by phone 801-406-6350 or Request a Free Quote. Let’s get your walls back to their glory!


