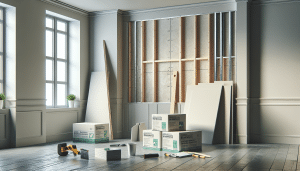
If you’re tackling drywall in Salt Lake, Davis, or Utah County, the right tools matter more than muscle. Good gear makes sheets easier to lift, joints cleaner to finish, and schedules tighter to keep. Skimp on tools and you fight the wall. Build the right kit and the wall starts cooperating. That’s the difference between patchy, wavy seams and a dead-flat finish that paints fast and sells the room.
Contents
- 1 Core tools that carry the job
- 2 Measure twice, carry once
- 3 Cutting and shaping without chaos
- 4 Hanging helpers that save backs and tempers
- 5 Fasteners and backing—because seams need somewhere to land
- 6 Taping materials that actually finish flat
- 7 Texture tools—because smooth isn’t the only finish in town
- 8 Dust control and site protection—keep the house livable
- 9 Sanding that doesn’t destroy the finish you just built
- 10 Primers and light—see the truth before paint
- 11 Sound, fire, and special cases
- 12 Small repairs need the same discipline
- 13 Season and climate notes for the Wasatch Front
- 14 Quick build: a pro’s field checklist
- 15 Why hire instead of hefting it yourself
- 16 Local team, regional standards
- 17 Ready to schedule? Keep it simple
Core tools that carry the job
Start with the essentials. These pieces see daily action and pay for themselves the first week.
- Cordless screw gun (collated if you want speed): DeWalt, Makita, or Milwaukee with depth-stop nose cone to prevent broken paper.
- Taping knives: 6″ for bedding, 10″–12″ for second/finish coats; stainless or blue steel for flex you can feel.
- Hawk or mud pan: Hawks train balance; pans keep things tidy. Pick your path and stick with it.
- All-purpose joint compound + lightweight finish mud: One for bonding, one for feathering.
- Drywall hand saw and keyhole saw: Quick cutouts and corrections without firing up power tools.
- Rasp: True the edge so seams kiss, not collide.
- Utility knife with snap-off blades: Clean score, clean snap—no drama.
Measure twice, carry once
Precision saves sanding later. A little discipline with layout beats heroics with a sander.
- 48″–54″ T-square: Straight scores and repeatable widths.
- Chalk line: Mark studs, control joints, and screw patterns—especially on ceilings.
- Laser level: Tracks lines across rooms when walls aren’t quite square (they rarely are along the Wasatch Front).
- Stud finder: Trust, then verify; older basements in Bountiful and Murray love surprises.
Cutting and shaping without chaos
Sheets are stubborn. Cut them clean and they behave. Cut them sloppy and they fight back.
- Roto-zip/spiral saw: Fast boxes and can lights. Practice on scrap, then hit the ceiling with confidence.
- Oscillating multi-tool: Tight repairs, door trims, little rescues that keep the day moving.
- Circle cutter: Repeatable holes for recessed cans—no guesswork.
Hanging helpers that save backs and tempers
Gravity doesn’t care about your weekend plans. Use mechanical advantage and keep the work steady.
- Drywall lift: One person, one ceiling—done. Especially nice for 5/8″ Type X on garages.
- Panel lifter/toe-kick: Leverage the first row tight to the floor or ceiling without crushed fingers.
- Telescoping support poles (third-hand): Hold awkward end seams while you fasten.
- Magnet bit holder + Phillips #2 and square #2 bits: No cam-outs, no shredded faces.
Fasteners and backing—because seams need somewhere to land
Here’s the small contradiction: fewer seams mean faster finishing, yet more backing blocks mean better seams. Both are true. Hang big sheets, but plan nailers.
- 1-1/4″ to 1-5/8″ coarse-thread screws for wood; fine-thread for metal studs.
- Pre-cut 2x backing or drywall Deadmen for corners and butt joints.
- Butt-board systems
Butt-boards recess butt joints so they finish like factory edges—worth it on long living-room runs in Draper or Lehi.
Taping materials that actually finish flat
Flat is a process. Bedding, fill, feather. Each pass needs the right combo.
- Paper tape for flats and corners; fiberglass mesh only with setting-type mud and on patches.
- Setting compounds (hot mud: 20/45/90): Fast patching and first coats in cool basements; set time beats cure time.
- Corner trowel or inside corner roller + flusher: Crisp lines, less touch-up.
- 12″–14″ finishing knife or curved trowel: Wide, even feathering that hides everything under paint.
Texture tools—because smooth isn’t the only finish in town
From South Jordan new builds to older North Salt Lake remodels, texture needs to match. New work looks wrong next to old if you miss the pattern.
- Hopper gun + compressor: Orange peel and knockdown that blend with local production homes.
- Knockdown knife: Pull the peaks at the right set—too early smears; too late chips.
- Stipple/Swirl brushes: Specialty ceilings when the room calls for character.
Dust control and site protection—keep the house livable
Utah dust is fine and relentless. Capture it early and you save the relationship with the homeowner—and your lungs.
- HEPA shop vac with dust-shroud sanders: Pull dust at the source.
- Zip-wall poles and plastic: Create clean zones in occupied homes in Layton or Provo.
- Drop cloths, surface film, ram board: Floors, stair treads, and cabinets stay clean.
- Respirator (P100), safety glasses, gloves: Non-negotiable, especially when sanding overhead.
Sanding that doesn’t destroy the finish you just built
Sanding is correction, not demolition. Let the knives do the heavy lifting, then touch the highs.
- Pole sander with 150–220 grit: Long strokes with the light, not against it.
- Sanding sponges: Nudge inside corners and repairs without cutting edges.
- Vac-attached orbital drywall sander: Big rooms, low mess, neighbors stay friendly.
Primers and light—see the truth before paint
Harsh light exposes bad seams. That’s not a problem; it’s a tool. Use it during finish, not after color.
- Work lights set raking across the surface: Highs and lows reveal themselves.
- High-build or PVA primer: Locks the surface so paint lays even. High-build helps minor chatter; PVA is quick and clean for rentals.
Sound, fire, and special cases
Some rooms aren’t standard. Shared walls, furnaces, garages—each adds rules you should respect.
- 5/8″ Type X for garages and furnace rooms when required; heavier, but calmer in a fire rating.
- Acoustic sealant and sound-damping compounds: Quiet bedrooms near busy roads in West Jordan or Farmington.
- Moisture-resistant board for baths and laundry; not a substitute for tile backer where direct water hits.
Small repairs need the same discipline
It’s tempting to treat patches casually. Don’t. Clean cuts, proper backing, fast set mud, feathered edges—same rules, shorter timeline.
- Repair clips or backing boards for 4″–10″ holes.
- Setting compound 20 or 45 for same-day prime in warm, dry rooms.
- Mini roller + primer to lock the patch before matching texture.
Season and climate notes for the Wasatch Front
Utah air runs dry; winter runs colder. Mud sets different at 20% humidity than it does after a spring storm. Keep a lid on buckets, add a touch of water when needed, and warm the room before finishing. That’s the mild contradiction: you want mud workable and you want it to set fast—control temperature and airflow to balance both.
Quick build: a pro’s field checklist
Pack this and you can frame the day without waiting on a store run.
- T-square, chalk line, laser
- Utility knife, rasp, keyhole saw
- Spiral saw, multi-tool, circle cutter
- Hawk or pan; 6″, 10″, 12″ knives; corner tools
- Cordless screw gun with depth stop; bits; coarse/fine screws
- Support poles, panel lifter, drywall lift (when solo)
- Paper tape, mesh (for patch work), hot mud 20/45/90
- HEPA vac, sanding pole, sponges
- Zip-walls, floor protection, PPE
- PVA or high-build primer, work lights
Why hire instead of hefting it yourself
Hanging and finishing isn’t mysterious. It’s rhythm, pace, and judgment—earned by repetition. If your schedule is stacked, if ceilings are tall, or if you need texture matched to a 1990s builder finish, bring in a crew that does this every week. Local techs know which primers pair with which paints and which textures actually match the neighborhood stock. They also bring the lift, the vac, and the patience.
Local team, regional standards
Crews working Salt Lake County through Utah County know the quirks—tight basement stairs in Millcreek, long ceiling spans in Daybreak, variable framing in older Orem splits. Tight seams and clean houses are the standard, not a bonus. If you want a quick walkthrough or a straight estimate, you can start at drywallrepairutah.com and keep moving.
Ready to schedule? Keep it simple
Set the scope, lock the dates, and get a finish that paints right. Two ways to reach us:
By Phone: 801-406-6350
By Form: https://drywallrepairutah.com/request-estimate/#free


