If you’ve ever stared at a wall full of nail pops, seams, or big ol’ taped joints and thought, “I could fix that,” you’re not alone. For homeowners in Salt Lake County, Davis County, and Utah County who want to tackle small repairs or at least understand what a pro does, knowing the right tools for drywall Mudding makes the job less scary and a lot cleaner. You know what? A few good tools—used well—can save time, money, and a fair bit of frustration.
Contents
- 1 Why the right tools matter (and why cheap stuff sometimes works surprisingly well)
- 2 Essential tools for drywall mudding — the must-haves
- 3 How to choose each tool (short, practical tips)
- 4 Tools for specific jobs (so you don’t waste time)
- 5 Tape and compound — the quiet heroes
- 6 Safety and cleanup — yes, it matters
- 7 When to call a pro (and why it’s okay to admit you need help)
- 8 Final thoughts — a quick checklist before you start
- 9 Ready to make your walls look right?
Why the right tools matter (and why cheap stuff sometimes works surprisingly well)
There’s a simple truth: the right tools let you look like you know what you’re doing. But here’s the mild contradiction—cheap tools can be fine for Patching a 4-inch hole. They just won’t make finishing big areas any easier. Let me explain: a good 12-inch Taping knife gives a smooth finish; a flimsy one leaves ridges that take longer to sand. Still, for a quick patch, a basic set will do the trick. You’ll learn faster with quality tools, but you don’t have to buy every expensive gadget for that first repair.
Essential tools for drywall mudding — the must-haves
Here’s the core kit that covers most homeowner projects. Think of it as your drywall first aid kit.
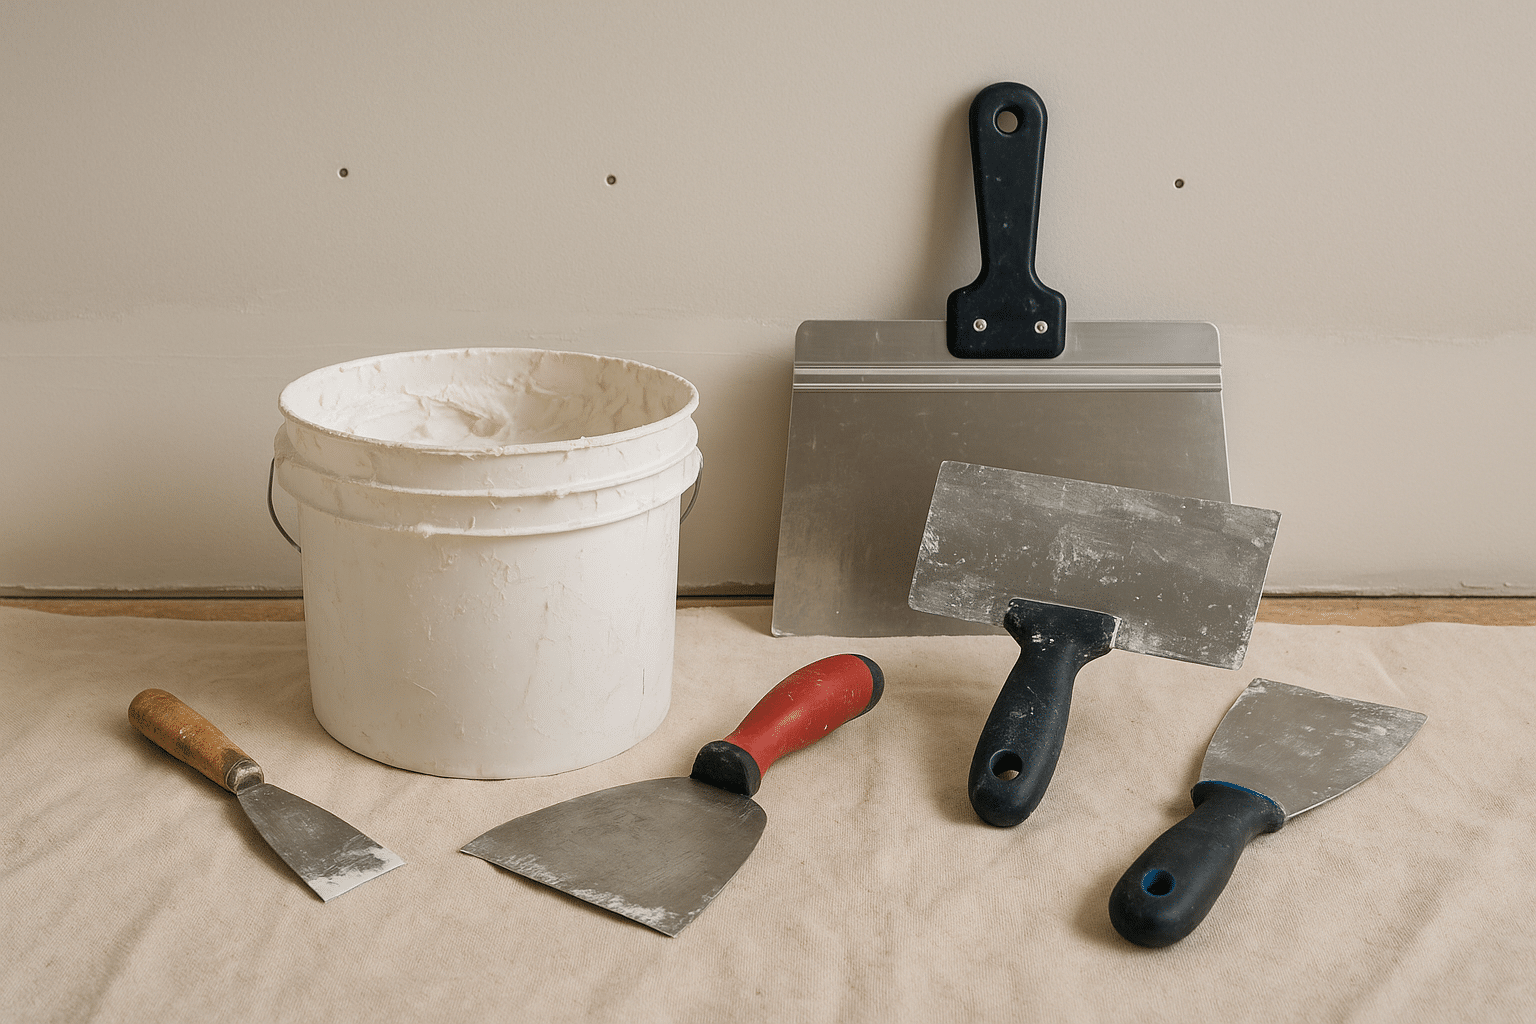
- Taping knives: 6-inch, 10-inch, 12-inch. The 6-inch is for tight spots and small patches; the 10-inch is your all-around; the 12-inch is for feathering and wider joints.
- Mud pan or hawk: Holds the joint compound while you work. Hawks give mobility; pans are easier to clean.
- Get a quality mud mixer: A drill with a stirring paddle (DEWALT or Makita work well) blends compound smoothly—no lumps, no drama.
- Sanding tools: Sanding block, pole sander, or a mesh sanding screen. For bigger jobs, an orbital drywall sander with dust collection saves your lungs.
- Joint Tape: Paper or fiberglass mesh—each has a use. Paper tape is stronger at seams; mesh is great for quick patching.
- Corner tools: Inside corner trowel or corner rollers make neat, consistent corners faster than freehand.
You’ll notice I didn’t start with a whole shop of power tools. That’s on purpose—basic projects rarely demand them.
How to choose each tool (short, practical tips)
Taping knives — sizes and why they matter
A 6-inch knife fits tight spots; a 10-inch balances control and reach; a 12-inch is for feathering. Smaller knives lay the mud, bigger knives spread it thin. You might think a single 12-inch could replace the others, but you’ll lose control around switches and edges.
Mixer vs. hand mixing
Yes, you can stir with a paddle stick and save money. But honestly, a drill-mounted mixer blends faster and prevents air bubbles. For homeowners doing multiple patches or a full room, it’s worth the ten-minute YouTube search and the five extra dollars on a better paddle.
Sanding — balance grit and dust control
Fine grit (120–220) smooths finishes; coarser grits remove humps. Use a dust-collection pole or a vacuum attachment when possible—Utah winters can trap dust indoors and you’ll appreciate cleaner air.
Tools for specific jobs (so you don’t waste time)
| Tool | When to use | Tip |
|---|---|---|
| 6-inch taping knife | Small holes, tight spots | Keep it clean to avoid dragging dried mud |
| 12-inch taping knife | Feathering, wide seams | Use long, smooth strokes for invisible seams |
| Mud mixer | Larger jobs, lump-free compound | Mix slowly to avoid bubbles |
Tape and compound — the quiet heroes
Here’s the thing: tape and compound choice changes the outcome more than you might expect. For standard seams, paper tape plus an all-purpose joint compound works great. For quick patches or where moisture might be an issue, fiberglass mesh and a setting-type compound can be smarter—especially for basements or garages in colder months.
Season matters too. Utah’s dry indoor heat in winter speeds drying; in humid summer months, compound takes longer to set. So, don’t rush sanding just because you’re eager—the compound needs its time.
Safety and cleanup — yes, it matters
Protect your lungs with a mask, and use eye protection when sanding. A cheap plastic tarp or rosin paper saves your floors and makes cleanup bearable. You’ll thank yourself later. Also, a wet sponge is your friend for smoothing edges before the compound fully dries—less sanding, less dust, happier you.
When to call a pro (and why it’s okay to admit you need help)
Some jobs are fine for a DIYer: small patches, screw pops, or sanding a single wall. But if you’re dealing with large patches, water damage, crown moulding transitions, or textured finishes matching a Popcorn or heavy knockdown, calling in pros like Utah Drywall & Repair saves time and avoids costly mistakes. You might start a repair thinking it’s small and end up hiring someone halfway through—totally normal. Professionals bring experience, tools you don’t have space for, and an eye for invisible finishes.
Final thoughts — a quick checklist before you start
Try this simple checklist before you begin:
- Gather your knives: 6″, 10″, 12″.
- Mixing tool: drill + paddle or pre-mixed compound.
- Sanding: block/pole and dust control.
- Tape and compound: paper tape for seams, mesh for quick patches.
- Safety: mask, goggles, tarp.
Do a small test patch first. Seriously — it teaches you how the compound behaves under your home’s temperature and humidity. It’s like rehearsing before the real play; fewer surprises on opening night.
Ready to make your walls look right?
If you’re in Salt Lake County, Davis County, or Utah County and want help choosing tools, getting a tidy patch, or finishing a whole room, give us a call. We’re friendly, fast, and we’ve done the messy stuff so you don’t have to. 801-406-6350 — or click Request a Free Quote to get started.


