Here is the full content you requested.
Drywall Taping might seem daunting, especially for the unseasoned homeowner. At Utah Drywall & Repair, we understand how crucial it is to get it right. This guide is designed to help our readers master the art of drywall taping with expert tips and techniques from our seasoned professionals. Read on to discover how you can achieve perfect seams, smooth finishes, and become a drywall taping connoisseur.
Contents
- 1 Understanding Drywall Taping Basics
- 2 Choosing the Right Materials
- 3 Preparation Is Key
- 4 Applying the Joint Compound
- 5 Placing the Tape
- 6 Smoothing the Surface
- 7 Feathering the Edges
- 8 Sanding for Perfection
- 9 Tips for Beginners
- 10 Common Mistakes to Avoid
- 11 Final Touches
- 12 Why Choose Utah Drywall & Repair
- 13 Ready to Get Started?
Understanding Drywall Taping Basics
Drywall taping is the process that follows Hanging your drywall sheets. It involves covering the seams where the sheets meet to create a smooth, continuous surface. This step ensures your walls are ready for Painting or wallpapering, creating a flawless look for your home.
Before you start, familiarize yourself with the basic tools and materials needed: joint compound, drywall Tape, taping knives, and a mud pan. Understanding these basics sets you up for success.
Choosing the Right Materials
The materials you select can make or break your drywall taping project. There are different types of drywall tape, each suited for specific situations.
Paper tape is the most common and provides excellent strength once applied. However, it can be tricky to work with for beginners.
Fiberglass mesh tape is easier to handle and is self-adhesive, making it a good choice for novices. However, it might not be as strong as the paper tape in the long run.
Preparation Is Key
Every successful drywall taping project begins with thorough preparation. Ensure the drywall surface is clean and free of dust. You can use a damp cloth to wipe down the seams and edges where the tape will be applied.
Next, gather all your materials and tools in one place. Having everything within reach will streamline your workflow and prevent unnecessary breaks during your project.
Applying the Joint Compound
Start by spreading a thin layer of joint compound over the seam using your taping knife. The joint compound, often referred to as “mud,” acts as the adhesive for your tape.
Ensure the layer is evenly spread. It should be just thick enough to hold the tape in place but not so thick that it creates lumps or bumps.
Placing the Tape
With the joint compound in place, it’s time to apply the tape. Cut a length of tape slightly longer than the seam you are covering.
Center the tape over the seam and gently press it into the joint compound. For paper tape, use your taping knife to embed the tape, ensuring there are no air bubbles or wrinkles.
Smoothing the Surface
Once the tape is in place, cover it with another thin layer of joint compound. This process, known as “bedding,” secures the tape and begins to hide the seam.
Use your taping knife to smooth out the compound, ensuring it feathers out from the tape edges. Apply gentle pressure to avoid creating grooves or marking the tape.
Feathering the Edges
The key to an invisible seam is feathering the joint compound. This technique involves blending the edges of the compound into the drywall surface.
Start with your taping knife at a slight angle and sweep it outward, applying consistent pressure. This helps create a smooth, seamless transition between the drywall and the compound.
Sanding for Perfection
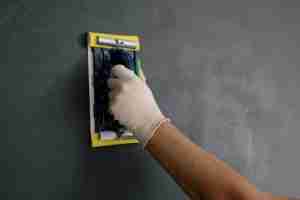
After the joint compound has dried, you’ll need to sand the seams. Use a fine-grit sanding sponge or sandpaper to smooth out any imperfections.
Be gentle and careful not to sand too much, as you can damage the tape and drywall. A light touch ensures a perfect finish without creating more work for yourself.
Tips for Beginners
Here are some expert tips to help those new to drywall taping:
- Start small, work on a few seams at a time to build confidence and skill.
- Keep your tools clean, regularly wipe down your taping knife and mud pan to prevent dried compound from ruining your work.
- Practice feathering, spend extra time mastering the feathering technique for invisible seams.
- Invest in good lighting, proper lighting helps you see every detail and catch imperfections early.
- Patience is key, don’t rush the drying or sanding process for the best results.
Common Mistakes to Avoid
Even experienced DIYers can make mistakes. Here are some common pitfalls and how to avoid them.
One major mistake is applying too much joint compound. This can lead to excess sanding and an uneven surface. Remember, less is often more.
Another common error is not allowing enough drying time between coats. Patience is crucial for a smooth, professional finish.
Final Touches
Once all seams are taped, covered, and sanded to your satisfaction, it’s time for the finishing touches. Inspect your work under different lighting conditions to ensure there are no visible seams or bumps.
After final sanding, wipe down the surface with a damp cloth to remove any dust. Your walls are now ready to be primed and painted or wallpapered as you desire.
Why Choose Utah Drywall & Repair
While DIY projects can be fulfilling, sometimes professional expertise is needed. At Utah Drywall & Repair, we bring years of experience and a commitment to quality to every project.
Our team is equipped to handle any drywall taping challenge, ensuring your walls are pristine and ready for finishing. Contact Us today to learn how we can assist with your next project.
Ready to Get Started?
If you’re ready to tackle your drywall taping project or simply need professional help, Utah Drywall & Repair is here for you. Give us a call at 801-406-6350 or Request a Free Quote today.


