
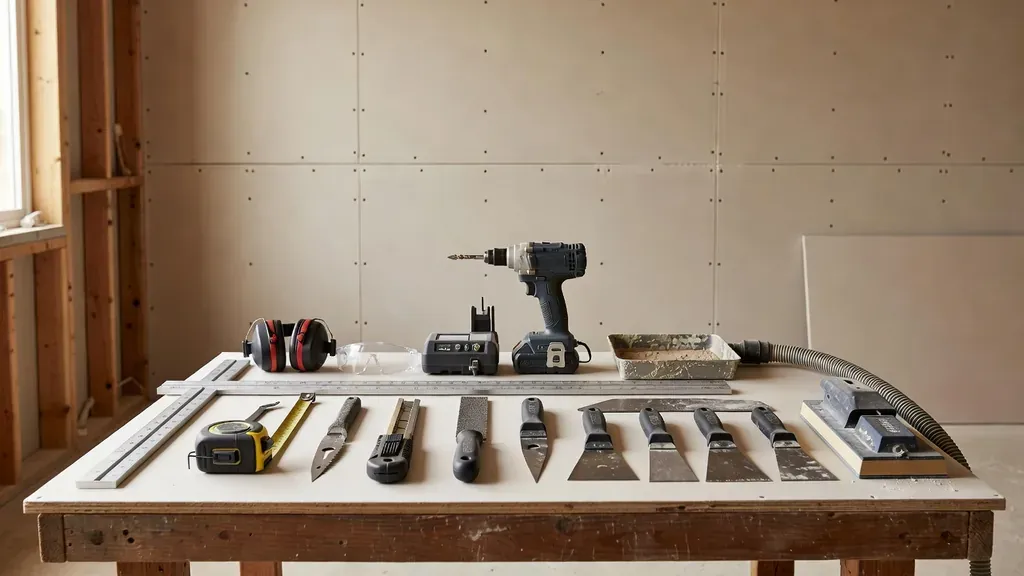
A drywall project gets expensive fast when the tool plan is wrong. The problem is rarely a missing gadget. It is usually a missing basic: a straight layout, a sharp blade, controlled screw depth, clean compound, or light placed low enough to expose a bad finish.
| Work phase | Core tools | Why they matter |
|---|---|---|
| Measure and cut | Tape, T-square, utility knife, keyhole saw | Accurate layout reduces waste and oversized gaps |
| Hang and fasten | Panel lift when needed, screw gun or drill with depth control | Stable handling and correct screw depth protect the panel face |
| Tape and finish | Mud pan, clean knives, corner tools when justified | Clean, controlled compound application reduces sanding |
| Sand and inspect | Sanding sponge or vacuum-assisted sander, side lighting, respirator | Dust control and low-angle light expose defects before primer |
Professional note: Buy the simple tools you will reuse. Rent panel lifts and specialty sanding equipment when one project does not justify ownership, storage, and maintenance.
The right kit depends on whether you are patching one hole, hanging a room, or finishing an entire basement. Start with the work you actually need to perform, then add specialty equipment only when it improves safety, speed, or consistency.
The core kit for almost every drywall job
A small repair and a full installation use many of the same fundamentals:
- A reliable tape measure
- A drywall T-square or long straightedge
- A sharp utility knife with spare blades
- A drywall rasp
- A keyhole saw for controlled openings
- A drill or screw gun with a drywall depth-control attachment
- A mud pan or hawk
- Taping knives in a few useful widths
- A sanding block or pole sander
- Strong side lighting
- Eye protection and job-appropriate dust control
That list is less exciting than a wall of power tools. It is also what keeps cuts square, fasteners consistent, and joint compound off the floor.
Measuring and layout tools
Tape measure and drywall T-square
A 25-foot tape works for most interior rooms. Pair it with a drywall T-square for fast crosscuts on standard panels. A regular framing square is useful elsewhere, but it does not replace the reach of a drywall T-square.
Measure from a known edge, mark both ends when accuracy matters, and verify openings before cutting. Electrical boxes, doors, windows, and off-square framing punish confident guessing.
Chalk line, level, and laser
A chalk line helps establish long reference lines. A four-foot level checks framing and panel alignment. A laser is useful on larger rooms, ceilings, soffits, and repeated elevations, but it is not a substitute for verifying the actual framing surface.
Cutting and fitting tools
Utility knife and rasp
For ordinary straight cuts, score the face paper against a straightedge, snap the panel, and cut the back paper. Keep blades sharp. A dull blade needs more force and is more likely to wander.
A rasp cleans a rough edge and makes a panel fit without turning every correction into another full cut. Use it lightly. Removing too much gypsum creates gaps that finishing compound should not be asked to hide.
Keyhole saw and circle cutter
A keyhole saw handles small openings and controlled interior cuts. A circle cutter can speed up repeated round openings, but every opening still needs to be measured against the real fixture or box.
Oscillating tools and rotary cutout tools can be useful on larger jobs. They also create dust quickly and can damage wiring, boxes, or framing when used blindly. Know what is behind the panel before the blade goes in.
Hanging and fastening equipment
Drywall screw gun or depth-control bit
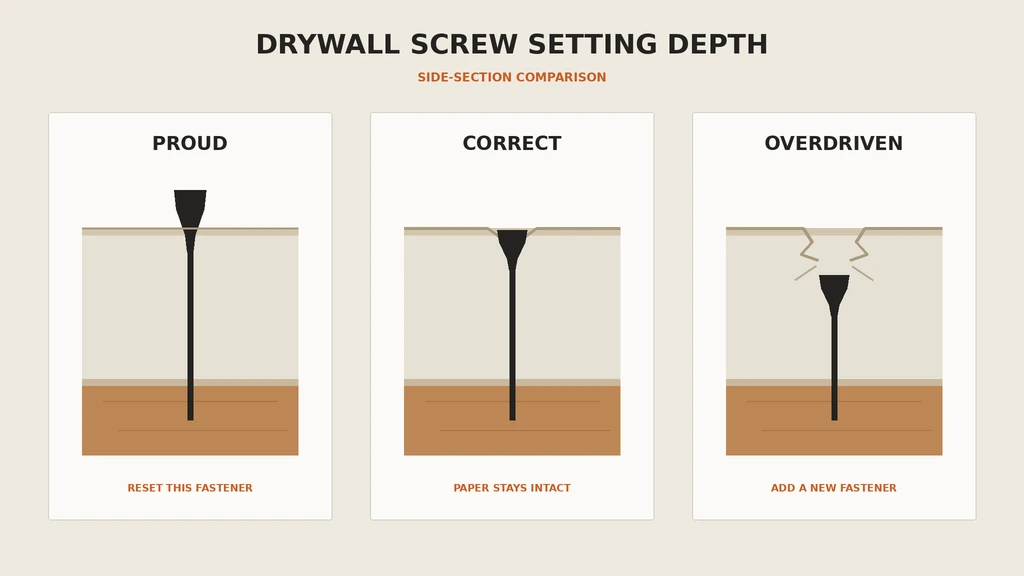
Fastener depth matters. The screw head should sit slightly below the panel surface without breaking the face paper. Overdriven screws lose holding power and can create visible defects later.
A dedicated screw gun is faster and more repeatable on large jobs. A drill with a drywall dimpler can work for smaller projects if the operator slows down and checks depth. Read our drywall screw guide before choosing fastener type and length.
Panel lift and panel supports
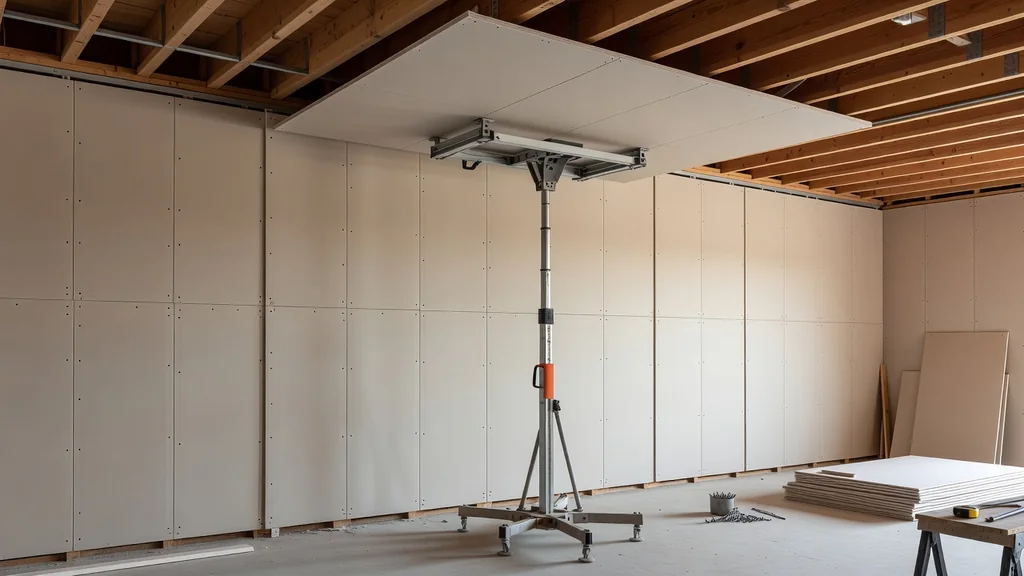
Ceiling panels are heavy, awkward, and easy to damage. A drywall lift holds a panel in position while it is fastened. Renting one for a ceiling is usually smarter than trying to balance a full sheet overhead.
Wall jacks, foot lifts, and temporary supports can help position panels. None of them make a too-large sheet safe for one person to carry through a tight stairwell.
Taping and finishing tools
Mud pan or hawk
A mud pan is compact and familiar for hand finishing. A hawk carries more compound and works well for broader plaster-style applications. Keep either one clean. Dried fragments dragged through fresh compound leave scratches and ridges.
Taping knives
A practical hand-finishing set often includes:
- A narrow knife for fasteners and tight repairs
- A 5- or 6-inch knife for embedding tape
- A 10-inch knife for the second coat
- A 12-inch or wider knife for feathering the finish coat
Wider is not automatically better. The goal is to spread each coat beyond the previous one while keeping the center controlled. See our joint-compound guide before mixing products or trying to speed up dry time.
Mixer and clean buckets
Larger finishing jobs benefit from a sturdy drill and proper mixing paddle. Add water only as the product instructions allow, in small amounts, and mix consistently. A dirty bucket can ruin an otherwise good batch.
Sanding, lighting, and dust control
Drywall dust travels. Use the least aggressive sanding method that produces the required surface.
- A sanding sponge is useful for edges and small repairs.
- A hand block gives control on patches and seams.
- A pole sander reaches walls and ceilings without grinding one spot too hard.
- A vacuum-assisted sander can reduce airborne dust when the tool and extractor are designed to work together.
Place a bright light nearly parallel to the wall. Side lighting reveals ridges, pinholes, sanding scratches, and proud fasteners that ceiling light can hide.
Check the safety data sheet for the compound and follow the manufacturer’s protective-equipment instructions. Control dust at the source, isolate the work area, protect eyes, and avoid treating a disposable dust mask as a complete cleanup plan. Our drywall sanding guide covers the finishing side in more detail.
A compact repair kit
For small holes, cracks, dents, and fastener repairs, you can work with a much smaller kit:
- Utility knife
- Straightedge
- Scrap drywall of matching thickness
- Backing strips and appropriate screws
- 4- and 6-inch knives
- Joint tape
- Compatible compound
- Sanding sponge
- Primer and matching finish paint
The repair still needs a solid substrate and a broad enough finish area. A tiny mound of compound over loose paper is not a durable patch.
What to rent instead of buy
Rent equipment when the tool is expensive, storage-hungry, or needed once:
- Drywall lift
- Panel cart
- Professional dust extractor
- Automatic taping tools
- Texture sprayer
- Large scaffold or rolling platform
Before renting, confirm accessories, filters, power requirements, and return-cleaning rules. A cheap rental becomes less cheap when the correct hose or attachment is missing.
Tool mistakes that create finish problems
- Using dull blades. Ragged paper and forced cuts create weak edges.
- Overdriving fasteners. Broken face paper reduces holding value.
- Mixing in dirty containers. Dried debris scores every coat.
- Sanding without side light. Problems appear after primer instead of before it.
- Using power tools without checking the cavity. Hidden electrical and plumbing damage is not a productivity gain.
- Buying specialty tools before mastering layout. A better gadget cannot fix bad measurements.
Choose tools around the finished result
The best drywall tool is the one that makes the next step more controlled. Sharp cutting tools protect the face paper. Depth control protects fastener holding power. Clean knives reduce sanding. Dust extraction protects the room and the people working in it.
For one small patch, keep the kit simple. For ceilings, large installations, detailed textures, or finish-critical lighting, bring in equipment that makes the work safer and more repeatable. If the tool list is starting to look like a second project, request an estimate and let us scope the drywall work directly.
Frequently asked questions
What tools do I need for a small drywall repair?
A utility knife, straightedge, matching drywall scrap, backing strips, appropriate screws, joint tape, compatible compound, two useful knife widths, a sanding sponge, primer, and matching paint cover many small repairs. Our invisible patching guide explains how those steps fit together.
Should I buy or rent a drywall lift?
Renting usually makes more sense for a ceiling or one-time project. Confirm the lift capacity, panel size, accessories, setup instructions, and return-cleaning requirements before use.
Why does drywall screw depth matter?
The head should sit slightly below the panel face without breaking the paper. Overdriven screws lose holding value and can contribute to visible defects. See the drywall screw selection guide for fastener planning.