
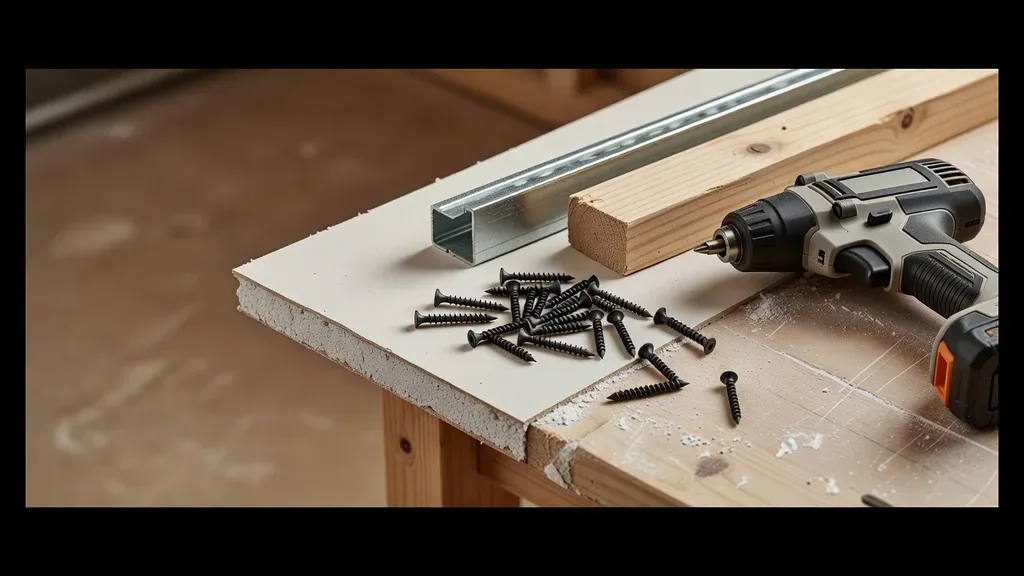
A drywall screw is part of an installation system. The correct fastener depends on the panel product, number of layers, wood or steel framing, framing thickness, wall or ceiling orientation, adhesive use, fire or sound assembly, and environmental exposure. Choosing by length alone can lead to stripped steel, torn face paper, inadequate framing penetration, or an installation that no longer matches a tested assembly.
For ordinary interior gypsum board, look for bugle-head drywall screws that comply with the panel manufacturer’s installation instructions and the applicable standard. ASTM C1002 covers steel self-piercing tapping screws used to attach gypsum panel products to wood or steel studs. Heavier steel can require a drill-point fastener covered by a different specification or by the listed assembly.
Safety and assembly note: Do not improvise fasteners in a fire-rated, sound-rated, shaft, ceiling, shear, tile, exterior, or proprietary wall system. Screw type, length, spacing, edge distance, panel orientation, framing, and layers work together. Follow the current tested design, project specifications, panel manufacturer, and applicable code. A longer screw is not automatically an approved substitute.
Start with the framing material
| Framing or substrate | Common drywall fastener family | What to verify |
|---|---|---|
| Wood studs or joists | Type W or other manufacturer-approved bugle-head screw, commonly with coarse threads | Required penetration into sound wood, panel thickness, layers, spacing, and ceiling requirements |
| Light-gauge steel framing | Type S self-piercing screw, commonly with fine threads | Steel thickness range, minimum penetration through the steel, point performance, and stripping risk |
| Heavier steel framing | Type S-12 or another approved drill-point screw | Steel gauge or thickness, drill-point capacity, head seating, and listed assembly |
| Gypsum layer over gypsum | Type G or system-specific laminating fastener in approved applications | Whether the design allows attachment to the base panel rather than framing |
| Specialty panel or backer | Product-specific corrosion-resistant or proprietary fastener | Exact panel literature, wet-area limitations, head geometry, coating, and substrate |
Retail labels often simplify this to “coarse thread for wood” and “fine thread for metal.” That is a useful first sort, not a complete specification. A fine-thread sharp-point screw that works in light steel may not drill heavier steel. A general interior drywall screw may not be approved for a tile backer, exterior soffit, glass-mat panel, or corrosive environment.
Match length to panel thickness, layers, and required penetration
The screw must pass through the gypsum panel and penetrate the framing by the amount required for that assembly. The Gypsum Association’s GA-216 guidance notes minimum penetration values and then ties final selection and spacing to panel type, framing, layers, adhesive, and orientation.
For planning only, common single-layer interior work often uses a 1 1/4-inch Type W bugle-head screw with 1/2-inch gypsum board over wood framing. A 5/8-inch panel over wood is often paired with a longer fastener, such as 1 5/8 inches, to provide the required wood penetration. These are common examples, not universal prescriptions.
Use this decision sequence:
- Confirm the exact panel product and thickness.
- Count all layers the screw must pass through.
- Identify wood, light-gauge steel, or heavier steel.
- Determine the required framing penetration from the current panel and assembly instructions.
- Check whether resilient channel, clips, furring, adhesive, or another component changes the fastening schedule.
- Confirm screw spacing and perimeter treatment separately from screw length.
- For a rated system, verify the listed design rather than relying on a generic chart.
A screw that is unnecessarily long can increase the chance of contacting hidden wiring, plumbing, or other components. It can also slow installation without improving the tested performance. Before fastening, know what is behind the framing plane.
Understand head, point, thread, and coating
Bugle head
The curved underside of a bugle head is designed to seat into gypsum face paper while leaving a shallow dimple for joint compound. Standard drywall work does not normally use a conventional flat-head wood screw. The head should end slightly below the surface without cutting through the face paper.
Sharp point versus drill point
Sharp self-piercing points are common for wood and light steel within the fastener’s rated capacity. Drill points are intended to penetrate thicker steel ranges. Check the manufacturer’s stated steel thickness. If a screw spins without seating or strips the framing, stop and correct the fastener selection or clutch setting.
Coarse versus fine thread
Coarse threads provide efficient purchase in wood. Fine threads are commonly used with light steel because they create more engagement in the thin metal. Thread style does not override the fastener type, material thickness range, or assembly instructions.
Coating and exposure
Black phosphate drywall screws are widely used for dry interior construction. Do not assume they are corrosion-resistant enough for wet rooms, exterior exposure, treated lumber, pool areas, commercial kitchens, or other aggressive conditions. The approved fastener may be coated, stainless, or proprietary, and it must be compatible with the panel, framing, treatment chemicals, and finish system.
Mold- and moisture-resistant drywall does not automatically make an ordinary interior screw suitable for direct wet exposure. See Installing Mold-Resistant Drywall for assembly boundaries.
How to drive a drywall screw correctly
The correct screw can still fail when it is overdriven, angled, or placed beside damaged board.
- Support the panel tightly. Hold the board against framing so the screw does not pull a gap closed after the head has seated.
- Drive square to the surface. An angled screw creates uneven head pressure and can tear the paper.
- Use a drywall dimpler or properly adjusted screw gun. Set the clutch or depth control on scrap material first.
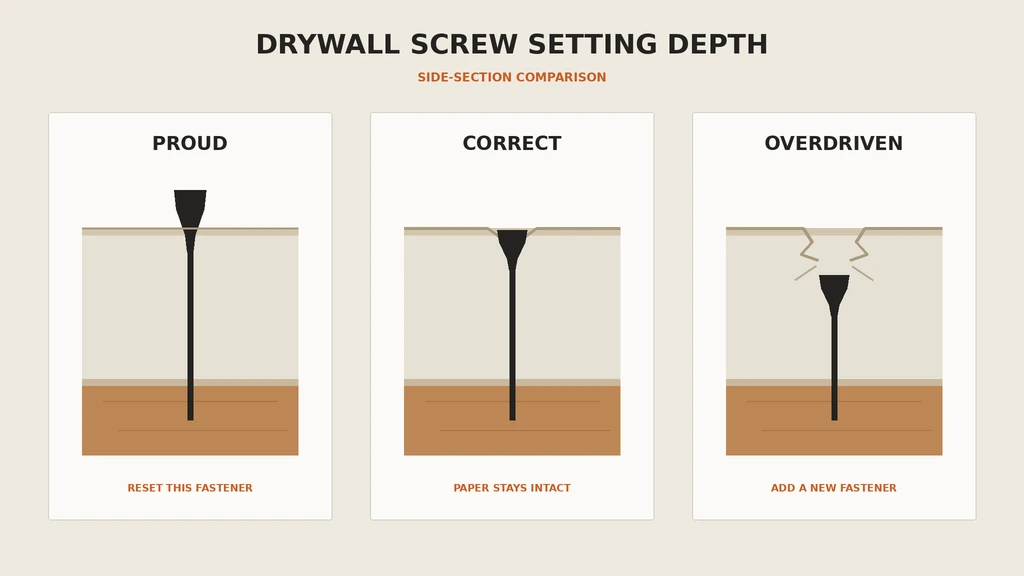
- Seat a shallow dimple. The head should sit just below the face without breaking the paper.
- Stop if the paper tears. Add a properly placed fastener nearby as allowed by the installation instructions and treat the damaged location during finishing. Do not count the torn-paper screw as sound attachment.
- Keep edges intact. Follow manufacturer edge-distance requirements and avoid crumbling a cut edge.
- Check the field with a broad knife. A knife passed across the heads will click on proud screws before taping begins.
Pro tip: Set depth on a scrap made from the actual panel and framing. A setting that works on 1/2-inch board over wood may overdrive on a softer panel or strip light-gauge steel.
Spacing is not one universal number
Screw spacing changes with ceilings versus walls, framing spacing, panel orientation, single or multiple layers, adhesive use, panel product, and rated designs. GA-216 provides application tables, while proprietary assemblies provide their own schedules. Do not take one common spacing, such as 12 or 16 inches on center, and apply it everywhere.
Ceilings deserve particular attention because panel weight, framing spacing, sag resistance, insulation load, and fastener schedule interact. Repairs also differ from new installation. A patch needs sound backing at every required edge rather than a handful of screws driven into unsupported board.
Common screw-selection and installation errors
| Error | Why it matters | Better decision |
|---|---|---|
| Using a wood screw or deck screw | Head geometry and listing may not match gypsum installation | Use an approved drywall or panel-system fastener |
| Using coarse thread in steel | May not engage or hold correctly | Select the specified Type S or drill-point fastener for the steel thickness |
| Using sharp point in steel that is too heavy | Point may skate, spin, or strip | Use the approved drill-point capacity |
| Driving through the paper | The face paper can no longer distribute head load correctly | Set depth control and replace the attachment as instructed |
| Leaving heads proud | Heads interfere with finishing and may show | Re-seat only if the framing still holds; otherwise correct nearby |
| Choosing length from panel thickness only | Framing penetration and layers are ignored | Calculate total thickness and required penetration |
| Substituting in a rated assembly | Can invalidate the tested design | Match the listed screw type, length, and spacing |
| Using interior screws in wet or exterior exposure | Corrosion can stain finishes or reduce attachment | Use the panel-system-approved corrosion-resistant fastener |
Screw pops are not always a screw-quality problem
A visible dimple or pop can result from framing shrinkage, movement, a panel held away from framing, overdriven paper, missed framing, inadequate fastening, moisture change, or compound placed over a proud head. Simply driving the old screw deeper may not solve the cause.
A repair typically involves locating sound framing, securing the panel correctly, dealing with the failed fastener, and refinishing the area. Repeated pops along a seam or ceiling can signal a broader installation or movement issue that deserves inspection.
For related guidance, see drywall installation services, the drywall thickness guide, the cutting and measuring guide, or request an estimate.
If screw pops keep returning or the panel does not feel solid, the problem may be bigger than the fastener. The team can check the board, framing, and surrounding finish before another repair is buried under compound. The company’s written estimate spells out the drywall and finish work the team will guarantee.
Frequently asked questions
Are coarse-thread drywall screws only for wood?
They are commonly used for wood framing, while fine-thread Type S screws are common for light steel. The actual fastener must still match the panel, framing thickness, layers, orientation, and assembly instructions.
What length screw should I use for 1/2-inch drywall?
A 1 1/4-inch Type W bugle-head screw is a common manufacturer-listed choice for some single-layer 1/2-inch panels over wood framing. It is not universal. Steel framing, ceilings, multiple layers, specialty panels, and rated assemblies may require something different.
Should a drywall screw break the paper?
No. The head should form a shallow dimple without tearing the face paper. A torn-paper attachment has lost the intended head support and should be corrected according to the installation instructions.
Can I use deck screws for drywall?
Do not substitute deck screws solely because they are corrosion resistant or available. Drywall and specialty panels use fasteners with specified head geometry, type, length, coating, and performance. Follow the panel or tested assembly.
Are drywall screws suitable for hanging shelves or cabinets?
Standard drywall screws are panel fasteners, not a default structural anchoring system. Shelves, cabinets, televisions, and heavy fixtures need attachment selected for the load and substrate, often into framing or an engineered anchor system.
Authoritative references
- Gypsum Association, GA-216-2024 Application and Finishing of Gypsum Panel Products
- Gypsum Association, Spacing and Installation of Fasteners
- ASTM International, ASTM C1002 Standard Specification for Steel Self-Piercing Tapping Screws
- USG, Sheetrock Brand Installation and Finishing Guide
- Gypsum Association, Frequently Asked Questions