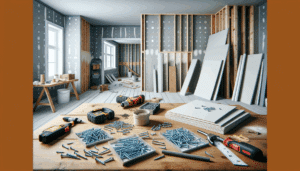
Welcome to the ultimate guide to Sheetrock installation by Utah Drywall & Repair. If you’ve ever faced the challenge of installing drywall and didn’t know where to start, then you’re in the right place. This comprehensive resource is designed especially for homeowners who want to take their home projects into their own hands. By the end of this guide, you’ll be armed with the knowledge and tips to tackle Sheetrock installation like a pro.
Contents
Understanding Sheetrock
Before diving into the installation process, it’s crucial to understand what Sheetrock is. Sheetrock is a brand name for drywall, a material used to create walls and ceilings in your home. It’s composed of gypsum plaster pressed between two thick sheets of paper. This material is favored for its quick installation time and fire resistance. Knowing the basics and the types available is the first step in ensuring a successful project.
Different types of Sheetrock serve various purposes, including moisture-resistant for bathrooms, fire-resistant for safety areas, and soundproofing for privacy. Choosing the right type for your specific project is vital in achieving the desired outcome and functionality.
Tools and Materials
Having the right tools and materials is essential for a smooth Sheetrock installation process. You will need more than just Sheetrock panels. Tools such as a drywall saw, utility knife, Tape measure, and a T-square are imperative for accurate measuring and cutting. Materials like drywall Screws, joint tape, and joint compound will also be on your shopping list.
Prepare your workspace by organizing all your tools and materials before starting. This organization will save you time and help avoid unnecessary interruptions during the installation process.
Preparation is Key
Before installing Sheetrock, it’s important to prepare the installation area thoroughly. This preparation involves checking the room for any irregularities, such as out-of-plumb walls or uneven surfaces. Address these issues beforehand to ensure a seamless installation. Also, make sure that the framing is secure and ready to hold the drywall in place.
An equally important step is to measure the installation area accurately. Measurements will dictate how much material you’ll need and reduce waste. Double-check measurements before cutting panels to ensure a perfect fit.
Measuring and Cutting
When it comes to Sheetrock installation, precision in measuring and cutting cannot be overstated. Use your T-square and drywall saw for straight, clean cuts. Always measure twice and cut once to avoid mistakes and material wastage. An improper fit can lead to more work, filling gaps or, worse, buying more material.
For outlets and switches, measure their location accurately and transfer these measurements onto your Sheetrock. Cutting these out will be easier before installing the panel. Remain patient and careful during this step to ensure a professional-looking finish.
Installation Tips
Now that your Sheetrock is ready to be installed, there are a few tips to keep in mind. Start with the Ceiling panels before the walls; this will support the weight of the walls and prevent the ceiling’s edges from crumbling. Utilize a drywall lift if available, especially for ceilings, to make the process easier and safer.
When installing on walls, make sure the edges of the Sheetrock line up with the center of the studs. This alignment will provide a sturdy base for Screwing in the panels. Avoiding alignment with the edges of studs can result in weak installations and potential problems down the line.
Securing Sheetrock
Securing Sheetrock correctly is crucial for a stable and long-lasting installation. Use drywall screws and a powered drill to attach the Sheetrock to the framing. Screws should be placed every 8 inches along the edges and 12 inches in the field (the center area of the panel). Ensure the screws are slightly recessed into the Sheetrock but be careful not to tear the paper coating.
Overdriving screws can compromise the structural integrity of the Sheetrock. If you make this mistake, it’s not the end of the world; simply drive a new screw near the damaged area. Performing this step with care will result in a cleaner finish and less work during the Mudding and Taping phases.
Mudding and Taping for a Smooth Finish
After securing your Sheetrock, the next step is mudding and taping. Apply joint compound (mud) to seams, corners, and screw indentations. Then, place joint tape over the seams, pressing it into the wet mud. The key here is to apply enough pressure to ensure it sticks but not so much that you squeeze all the mud out.
Once the tape is applied, add another layer of mud over the top, smoothing it out with a wide drywall knife. This process will take practice to perfect, but achieving a smooth, seamless finish will make all the difference in the appearance of your walls and ceilings.
The Finishing Touches
After the mud has dried—which can take 24 hours or more—it’s time to do some Sanding. Sanding smooths out any imperfections and prepares the surface for Painting or wallpaper. It’s a messy job, so wear protective gear and consider sealing off the room to prevent dust from spreading throughout your house.
Inspect your work carefully. Any indentations or rough spots will need further attention. Repeat the mudding and sanding process as needed to achieve the best possible surface. Patience during this phase pays off with professional-looking results.
Safety First
Sheetrock installation, like any home improvement project, comes with its hazards. Wear safety glasses to protect your eyes from dust and debris. Gloves will protect your hands during cutting and handling of the Sheetrock. Moreover, if you’re working on a ceiling, ensure that your ladder or lift is stable and secure to prevent falls.
Ventilation is also important, especially during the sanding process. Drywall dust can be harmful if inhaled, so ensure proper airflow and consider wearing a dust mask or respirator for additional protection.
Pro Tips for a Stellar Installation
- Invest in Quality Tools High-quality tools can make a significant difference in the ease and quality of your installation. Don’t skimp on these; they’re an investment in your home.
- Keep Your Workspace Clean A clean and organized workspace not only makes the installation process smoother but also safer.
- Practice Makes Perfect If you’re new to Sheetrock installation, consider practicing on a small piece before tackling a whole room. This practice can save you time and materials in the long run.
- Don’t Rush the Process Taking your time to measure, cut, and install correctly will result in a much better finish.
- Seek Professional Advice If you’re unsure about anything, don’t hesitate to reach out to a professional for advice. We’re here to help!
At Utah Drywall & Repair, we understand the importance of feeling proud of your home. Sheetrock installation can be a daunting task, but with the right preparation, tools, and techniques, it’s definitely achievable. Remember, if at any point the project becomes overwhelming, we’re just a phone call away. Contact Us at 801-406-6350 or Request a Free Quote. Our team of experts is ready to assist you in ensuring your Sheetrock installation is done right, leaving you with results you can be proud of.


