Drywall installation can be daunting for homeowners, but it doesn’t have to be. At Utah Drywall & Repair, we know the challenges you face and we’re here to offer you the perfect guide to make it manageable. This article will help you master drywall installation, providing you with valuable tips and tricks to complete your project successfully. Let’s get started!
Contents
- 1 Understanding Drywall Materials
- 2 Gathering the Right Tools
- 3 Prepping the Workspace
- 4 Measuring and Cutting
- 5 Installing Drywall Sheets
- 6 Taping and Mudding
- 7 Sanding for Smoothness
- 8 Priming and Painting
- 9 Common Mistakes to Avoid
- 10 Final Touches and Cleanup
- 11 Why Choose Utah Drywall & Repair?
- 12 Contact Us Today
Understanding Drywall Materials
Before you begin, it’s important to understand the different types of drywall materials available. From standard drywall to moisture-resistant and fire-resistant options, knowing the right type for your project is crucial. This can significantly impact the durability and functionality of your finished wall.
Standard drywall is the most common type used in Residential buildings. Moisture-resistant drywall, often called greenboard, is ideal for areas prone to humidity like bathrooms. Fire-resistant drywall, or Type X, is thicker and used in garages and areas require enhanced fire resistance.
Gathering the Right Tools
Having the correct tools will make your installation process smoother. Here’s a list of essential tools you’ll need:
- Utility knife: For cutting drywall to fit your space.
- Drywall saw: Useful for cutting holes for outlets and switches.
- T-square: Ensures your cuts are straight and precise.
- Drywall Screws: They hold the drywall securely in place.
- Tape measure: An essential tool to measure your spaces accurately.
Prepping the Workspace
Preparation is key to any successful drywall project. Start by cleaning the workspace, removing any debris, and ensuring the area is free from obstructions. This will give you a clear and safe working area.
Next, protect the floors and any furniture with drop cloths or plastic sheets. This will make cleanup much easier once you’re done.
Measuring and Cutting
Accurate measurements are critical. Measure the height and width of the wall where you will install the drywall. Write down these measurements so you can transfer them to the drywall sheets.
Use a utility knife to score the drywall along the measured lines. Once scored, snap the drywall along the score line for a clean cut. Remember to double-check your measurements before you cut to avoid any mistakes.
Installing Drywall Sheets
Start by installing drywall sheets to the Ceiling before moving to the walls. This will prevent the wall sheets from being damaged by the ceiling sheets. Attach the drywall to the studs using drywall screws, spacing them 12 inches apart.
It’s a good practice to stagger the joints between sheets. This not only adds stability but also makes the installation look cleaner. Ensure that the sheets fit snugly together with minimal gaps.
Taping and Mudding
Taping and mudding are essential to hide seams and create a smooth surface. Apply drywall tape over the joints to strengthen them. Use joint compound (mud) to cover the tape, smoothing it out with a drywall knife.
Allow the mud to dry completely before Sanding. You may need to apply multiple layers, sanding between each to achieve a flawless finish.
Sanding for Smoothness
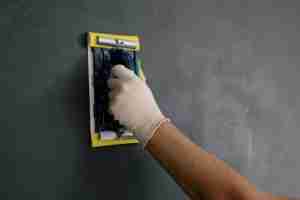
Once the joint compound is dry, gently sand the area using a sanding sponge or sandpaper. The goal is to smooth out any imperfections and create a uniform surface. Be patient during this step as rushing it can result in an uneven finish.
Remember to wear a mask and goggles to protect yourself from dust. After sanding, wipe down the walls with a damp cloth to remove any remaining dust.
Priming and Painting
This step isn’t just about aesthetics; it also protects your drywall. Apply a primer to the walls before painting. Primer helps paint adhere better and creates a uniform base for the topcoat.
Once the primer is dry, you can proceed to paint your walls in the color of your choice. Apply at least two coats of paint, allowing each coat to dry completely before applying the next.
Common Mistakes to Avoid
- Skipping the primer: Always prime your drywall before painting to ensure better adhesion and coverage.
- Over-sanding: Sand cautiously as excessive sanding can damage the drywall.
- Incorrect screw placement: Place screws 12 inches apart to prevent sagging or popping.
- Rushing the mudding process: Allow each layer of mud to dry fully before sanding or applying the next layer.
- Ignoring safety measures: Wear protective gear to avoid inhaling dust and to keep your eyes safe.
Final Touches and Cleanup
Your drywall installation is almost complete! Now it’s time for final touches and cleanup. Inspect your work for any imperfections and touch them up as needed. Small nicks and holes can be easily filled with a bit of joint compound.
Once satisfied with the finish, remove all the protective coverings from floors and furniture. Clean the area thoroughly, disposing of any debris properly.
Why Choose Utah Drywall & Repair?
While we’ve provided a comprehensive guide, sometimes professional help is the best route. At Utah Drywall & Repair, our expert team ensures a flawless finish without the hassle. We bring years of experience and a commitment to quality to every project.
From minor repairs to complete installations, we handle it all. Trust us to make your drywall project a breeze.
Contact Us Today
Ready to tackle your drywall project but need a helping hand? Contact Utah Drywall & Repair by phone # 801-406-6350 or Request a Free Quote. We’re here to help!


