
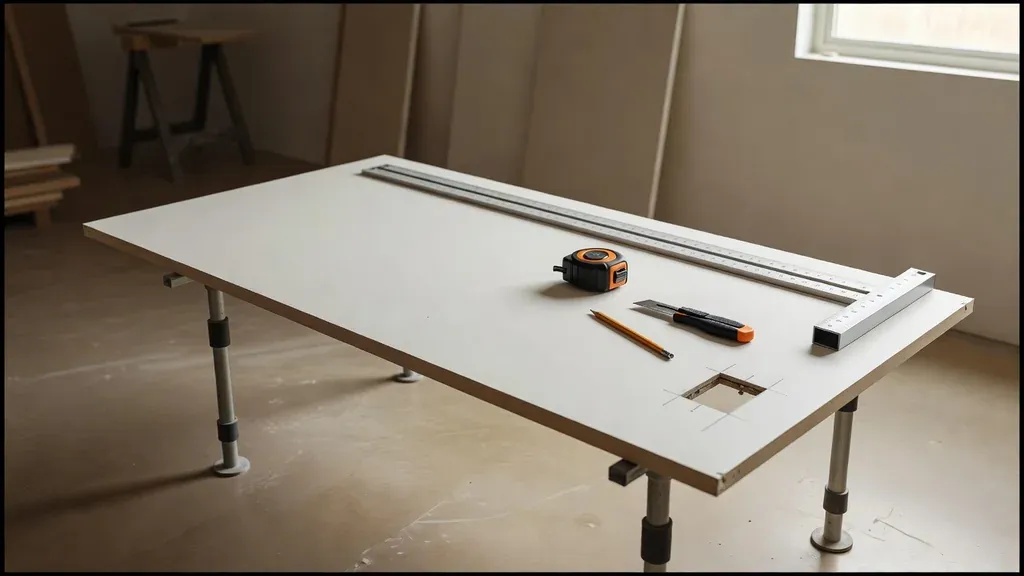
Accurate drywall cuts make hanging and finishing easier. A clean panel edge needs less correction, openings land where they belong, and joints can be supported and finished without filling avoidable gaps. The key is to plan the panel before measuring individual cuts.
Measure from known reference points, record the direction of each dimension, and mark the board face clearly. Then dry-fit before fastening. Drywall is easy to trim and hard to add back once an opening is oversized.
Pro Tip: Mark the room, wall, panel orientation, and top edge on the back of each cut piece. A correct cut can look wrong when the panel is rotated or carried to the wrong opening.
Plan the Layout Before the First Cut
Panel layout controls more than material waste. It determines where seams land, whether cut edges have backing, how many butt joints need finishing, and whether door and window openings create weak joint locations.
Before cutting, review:
- panel type and thickness required for the assembly;
- wall and ceiling dimensions;
- framing direction, spacing, alignment, and backing;
- door, window, electrical, plumbing, and mechanical openings;
- inside and outside corners;
- control-joint and expansion details in the project documents;
- panel orientation and fastener schedule required by the assembly;
- safe handling paths for full and cut sheets.
Avoid placing a panel edge where it cannot be fastened or supported. Do not assume framing is straight, plumb, square, or consistently spaced. Check the actual surface.
If the project involves a rated assembly, use the listed design and current panel instructions. Seams, layers, fasteners, and penetrations can affect performance. The drywall thickness guide explains why thickness alone is not the full specification.
Essential Measuring and Cutting Tools
| Tool | Primary use | Selection and use note |
|---|---|---|
| Tape measure | Dimensions and opening locations | Confirm the hook and case are undamaged; read from consistent reference points |
| Drywall T-square or long straightedge | Square crosscuts and scoring guide | Keep the guide seated against the factory edge |
| Sharp utility knife | Scoring face paper and cutting backing paper | Retract or cover the blade during transport; change dull blades safely |
| Pencil | Layout marks and defect notes | Use light marks that remain visible without cutting the paper |
| Drywall saw | Interior cutouts and irregular openings | Use shallow strokes and identify utilities behind the panel |
| Drywall rasp | Minor edge correction | Remove small amounts and preserve the paper face |
| Circle cutter or hole saw | Round openings when appropriate | Verify diameter, center, and clearance before cutting |
| Panel lifter or lift | Positioning wall or ceiling panels | Use equipment rated and configured for the sheet and task |
Powered cutout tools can be efficient in practiced hands, but they can damage wires, boxes, plumbing, and framing when used blindly. A hand tool offers more control for many DIY openings.
Use a Consistent Measurement System
Drywall measurements often fail during transfer, not during reading. The installer measures from the left on the wall, then marks from the right on the panel without reversing the dimension. Or the board is flipped, moving the opening to the opposite side.
A simple system prevents that:
- Choose a reference edge, such as the left corner, floor line, or installed panel edge.
- Measure every horizontal dimension from that same reference when practical.
- Measure vertical dimensions from a defined floor, ceiling, or panel edge.
- Sketch the panel and label which face will point into the room.
- Write each dimension with a directional arrow.
- Transfer measurements to the correct panel face and orientation.
- Check the marks against a second reference before cutting.
Measure the actual opening at more than one point when framing may be out of square. For irregular conditions, a cardboard or scrap template can be more reliable than a series of unrelated numbers.
Estimate Material Without Treating the Math as Layout
Wall area divided by panel area can provide a rough material quantity, but it does not tell you how the sheets will fit. Openings, offcuts, staggered seams, room geometry, damaged sheets, and panel lengths affect the final count.
Create a panel-by-panel layout for complicated rooms. Use full sheets where they reduce seams and handling remains safe. Plan useful offcuts for short walls, headers, and patches. Keep panel type separate so a moisture-resistant or fire-rated offcut is not confused with regular board.
Do not subtract every door and window from a rough order automatically. Some opening area becomes waste because the remaining shape cannot be reused efficiently. Supplier and contractor takeoffs may include a practical waste allowance based on the layout, not a universal percentage.
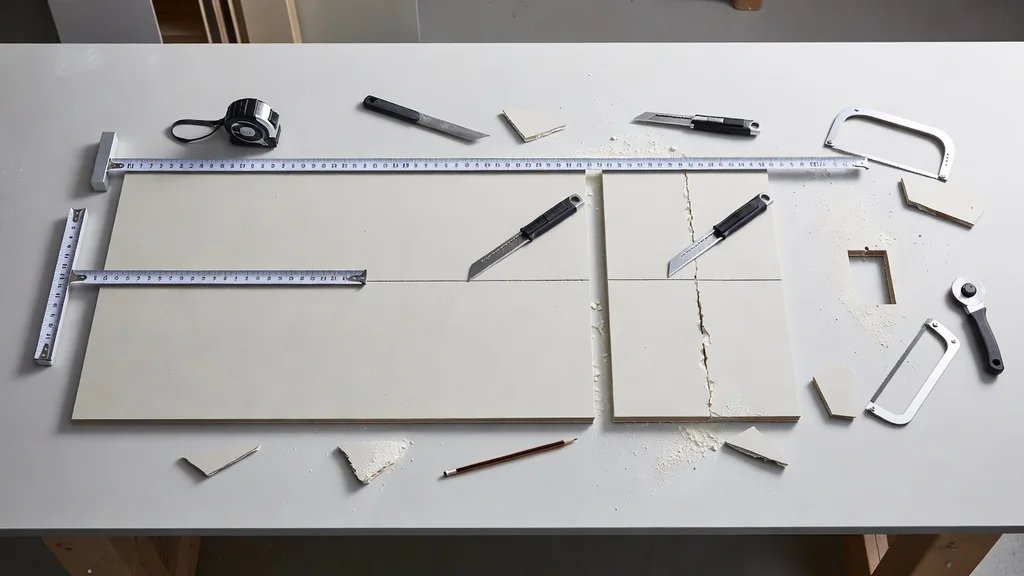
Make a Clean Score-and-Snap Cut
A straight crosscut usually does not require sawing through the gypsum core.
Score-and-snap sequence
- Place the panel face side up on stable support.
- Mark the cut at both edges when needed.
- Seat a T-square or straightedge against the factory edge.
- Score the face paper in one controlled pass with a sharp utility knife.
- Move the panel so the scored line can break safely without falling.
- Snap the gypsum core away from the scored face.
- Fold the cut piece back and slice the back paper from the fold.
- Rasp only enough to remove a high edge or improve fit.
The score needs to cut the face paper, not plow deeply through the core. Deep knife pressure increases slip risk and can leave a ragged line. Keep the free hand out of the blade path.
Long rip cuts can also be scored and snapped, but narrow strips may break irregularly. Support the board, use a straight guide, and expect more edge refinement. For very narrow pieces or specialty panels, follow the manufacturer’s recommended cutting method.
Safety: Cut away from your body, keep hands clear of the blade path, retract the knife when not in use, and dispose of used blades in a puncture-resistant container. Wear eye protection when sawing or rasping.
Transfer Electrical and Plumbing Openings Carefully
Openings are where small measurement errors become expensive. An oversized cut can reduce support around a box and create finish, fire, sound, or air-sealing problems. An undersized cut is usually easier to correct, but forcing the board over a device can break the panel.
A reliable rectangular-opening method
- Confirm the circuit is turned off and verify the work area is de-energized with an appropriate test method.
- Measure from the same panel references to the near and far edges of the box.
- Measure from the panel reference to the top and bottom edges.
- Transfer those four lines to the board in the correct orientation.
- Compare the marked rectangle to the actual box dimensions.
- Cut conservatively with a drywall saw or another approved tool.
- Dry-fit and trim small areas as needed.
Do not bury junction boxes behind drywall. Device boxes must remain accessible and should finish at the proper relationship to the completed wall surface as required. Box extensions or other corrections may be needed when wall thickness changes, but electrical work should be handled by a qualified person when it exceeds your competence.
For round pipes and fixtures, measure to the center from two references, confirm diameter and required clearance, and use the proper hole-cutting tool. Split pieces or oversized notches around pipes create weak areas and extra finishing.
Cut Around Doors and Windows Without Weak Joints
Openings concentrate movement at their corners. Panel layout should avoid unnecessary joints that terminate at a door or window corner when the approved layout and sheet size allow a better arrangement. A cutout made within a larger sheet can reduce the number of joints near the opening.
Measure both sides because framing may not be square. Mark the opening, support the panel during the cut, and avoid overcutting past a corner. A saw kerf that extends beyond the layout can become a crack path or visible defect.
Coordinate the drywall face with jambs, corner bead, trim, tile, and window returns. A piece that technically covers the framing can still create a poor finish if its edge leaves no room for the specified corner treatment.
Scribe Irregular Surfaces
Existing stone, timber, plaster, sloped ceilings, and out-of-square corners rarely match a single tape measurement. A scribe or template transfers the actual shape.
- Hold the panel or template in its intended position without forcing it.
- Maintain the required relationship to the irregular surface.
- Use a compass, spacer block, or profile tool to copy the contour.
- Mark orientation before removing the piece.
- Cut just outside the line, then refine gradually.
- Dry-fit repeatedly rather than trying to reach the final shape in one cut.
The surrounding material may require a movement joint, sealant, trim, or another detail instead of a tight drywall fit. Follow the project design rather than packing compound into a moving transition.
Refine Edges Without Destroying Them
A drywall rasp is for small corrections. It should not turn a badly measured panel into a usable one by removing a large strip. Rasp from the face toward the back when practical so the face paper remains supported, and keep the edge reasonably square.
Loose paper can interfere with finishing. Trim a small flap cleanly rather than pulling it along the face. Avoid beveling every cut edge by habit. Joint preparation should follow the selected system and manufacturer instructions.
After refining:
- remove loose gypsum dust;
- inspect the face paper for tears;
- test the piece against the opening;
- verify there is backing at the joint;
- confirm the gap is within the panel and joint-system requirements;
- label the piece before setting it aside.
Common Measuring and Cutting Failures
| Failure | Likely cause | Prevention |
|---|---|---|
| Opening appears on the wrong side | Panel was flipped or measured from the opposite reference | Sketch face orientation and use directional arrows |
| Cut edge has no framing | Layout was based only on room area | Map framing and backing before sheet layout |
| Outlet cut is oversized | Measurement was transferred from center without box dimensions | Mark all four edges and dry-check the rectangle |
| Straight cut wanders | No guide, dull blade, or repeated scoring | Use a seated T-square and one controlled score |
| Face paper tears | Dull blade, unsupported snap, or aggressive rasping | Use a sharp blade and support both panel sections |
| Door corner cracks later | Joint or overcut ends at a stress concentration | Plan sheet layout around openings and avoid overcutting |
| Panel breaks during handling | Unsafe carry path or unsupported offcut | Clear the route and support long or narrow pieces |
Hidden Utilities and Older Finishes
Cutting into an existing wall is different from cutting a new sheet on sawhorses. Wires, pipes, ducts, blocking, and fasteners may sit just behind the paper. Use the shallowest cut that does the job, investigate from an existing opening when possible, and stop when conditions are uncertain.
Older painted surfaces may involve lead-based paint, and some older textures or other materials may contain asbestos. Before a renovation disturbs suspect material, use the appropriate testing and work practices. A utility knife and shop vacuum do not replace lead-safe or asbestos-safe procedures.
For an existing damaged wall, drywall repair services may be a better fit than treating the work as new installation.
Cutting Ceiling Panels Safely
Ceiling sheets are heavy and awkward. Cut them on stable support at floor level when possible. Confirm the opening locations before lifting, and use a panel lift or enough trained help for the sheet and room.
Do not balance a full panel overhead while trying to mark a missed light or vent. Lower the panel, correct the layout safely, and lift it again. Use stable access equipment, keep the floor clear, and coordinate hand signals with helpers.
Panel selection matters overhead. Check the product’s ceiling application, framing spacing, orientation, finish, and fastener requirements. The broader gypsum board installation guide covers sequence and handoff.
When Professional Installation Saves Rework
A small rectangular patch is different from laying out a basement, stairwell, vaulted ceiling, or commercial tenant space. Professional installation makes sense when the project includes:
- many electrical, plumbing, or mechanical penetrations;
- high or sloped ceilings;
- fire-rated or sound-control assemblies;
- long sheets and limited handling space;
- curved or irregular surfaces;
- multiple panel types by room;
- tight coordination with cabinets, tile, doors, and other trades.
Utah Drywall & Repair has more than 20 years of drywall experience, with drywall as the primary trade. See drywall installation services or send plans, photos, approximate dimensions, and project details through the estimate request.
Frequently Asked Questions
Which side of drywall should face the room?
For standard paper-faced gypsum board, the designated face is intended for finishing. Product construction varies, so follow the panel markings and manufacturer instructions rather than judging only by color.
Should drywall fit tightly against every surface?
Not necessarily. Perimeters, control joints, dissimilar materials, and some assemblies require specific gaps or details. Follow the approved design and current product instructions instead of using one gap rule everywhere.
Can I use a circular saw to cut drywall?
Score-and-snap cutting is usually cleaner and creates less airborne dust for straight cuts in standard board. Powered saws create substantial dust and add blade and hidden-utility hazards. Use only a method approved for the product and task with proper controls.
How do I avoid cutting an outlet opening too large?
Measure all four box edges from consistent panel references, mark the board in the correct orientation, cut conservatively, and dry-fit. Do not rely on one center measurement.
How much extra drywall should I buy?
It depends on the panel layout, room geometry, sheet lengths, openings, specialty board, and usable offcuts. Build a panel takeoff and include practical waste rather than applying one universal percentage.