
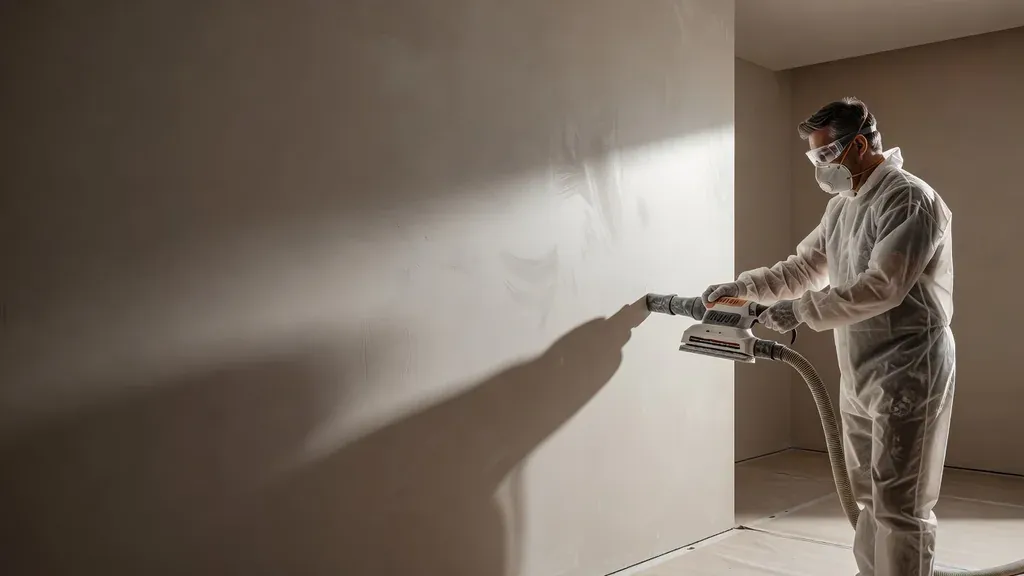
Drywall sanding is a refinement step, not the main shaping process. Well-applied joint compound should need light sanding to remove small ridges, lap marks, and scratches. If the surface needs aggressive grinding, it is usually better to scrape a high ridge or apply another controlled coat than to keep removing material.
That distinction protects the tape, drywall face paper, corners, and surrounding paint. It also limits dust. The best sanding job often starts with better mudding and fewer passes.
Pro Tip: Circle defects with a pencil under low-angle light. Sand high spots, fill low spots, and stop when the transition is smooth. Treating every mark as something to sand wastes time and can damage the surface.
Mistake 1: Sanding Compound That Is Still Damp
Drying-type joint compound must dry through its full thickness before sanding. Setting-type compound hardens chemically, but the product may still contain moisture after it has set. Sanding too soon can clog the abrasive, roll the surface into crumbs, pull material from the joint, or create gouges.
Drying time varies with:
- compound type and product formula;
- coat thickness;
- temperature and relative humidity;
- ventilation and air movement;
- substrate condition;
- whether several layers are drying in the same area.
A pale surface is not proof that a thick fill is dry underneath. Follow the product instructions and allow more time when the center looks darker, feels cool, or remains soft. Do not force-dry fresh compound with an unsafe heater or concentrated heat.
Mistake 2: Using Sanding to Fix Poor Mudding
Sandpaper removes material. It cannot fill a hollow, replace missing compound, bond loose tape, or flatten a patch that sits proud of the wall.
| Defect | Wrong response | Better response |
|---|---|---|
| Sharp dried ridge | Grind the whole joint aggressively | Scrape the ridge carefully, then sand the remaining mark |
| Shallow low edge | Sand the surrounding wall down | Apply a thin, wider finish coat |
| Tape bubble | Sand until tape is exposed | Cut out the loose section and repair it |
| Proud patch panel | Add more mud and sand repeatedly | Correct the patch plane or backing first |
| Pinholes | Sand the area thinner | Tight-skim with compatible compound |
| Deep sanding scratch | Assume primer will fill it | Skim, dry, and sand lightly |
If the joint shape is still being built, return to the smooth drywall mudding techniques before continuing.
Mistake 3: Choosing Abrasive by Habit
There is no universal grit that is correct for every joint compound and stage. Compound hardness, abrasive type, whether a power or hand tool is used, and the manufacturer’s recommendations all matter. Very coarse abrasive can cut deep scratches quickly. An extremely fine abrasive may polish without correcting a noticeable ridge and can encourage excessive time on the wall.
A practical selection process is:
- Read the compound and sanding-tool instructions.
- Start with the least aggressive abrasive that will correct the dry defect efficiently.
- Test in a small area.
- Use lighter pressure as the surface approaches the desired finish.
- Replace clogged or damaged abrasive rather than pressing harder.
Sanding screens remove material efficiently but can leave a distinct scratch pattern and release substantial dust. Sponges conform to corners and small patches but can round a plane if used unevenly. Pole sanders cover broad areas but can flip and gouge the surface. Powered sanders require even more control and effective dust extraction.
Mistake 4: Pressing Too Hard
Heavy pressure creates several problems at once. It cuts through the compound quickly, deepens scratches, fatigues the worker, and makes a pole-sander head more likely to flip. It can also expose tape or roughen drywall paper.
Keep the sanding face flat and use overlapping passes with light, even pressure. Let the abrasive cut. If it is no longer cutting, inspect for damp compound, clogging, or a defect that should be scraped instead.
At inside corners, avoid sanding across the adjacent finished surface. A sanding sponge or folded abrasive may provide more control, but the goal is still to preserve the corner line rather than soften it.
Mistake 5: Damaging Tape and Face Paper
Paper tape and drywall face paper are part of the finished surface. Once they are scuffed or fuzzed, paint alone will not restore a smooth profile. Exposed tape may also indicate that the joint does not have enough compound over it.
Stop sanding if you see:
- a change from compound to the color or texture of paper tape;
- brown or rough face paper around a repair;
- fibers lifting from the surface;
- a corner bead edge becoming exposed;
- fastener paper tearing around the dimple.
Minor damaged paper may need a compatible sealer before skim coating so moisture in the compound does not cause bubbling. Product compatibility matters. Loose or badly torn material should be removed and repaired rather than hidden.
Pro Tip: Do not sand a low spot. Mark it, skim it with a clean knife, let it dry, then feather the correction.
Mistake 6: Inspecting Under Flat Room Light
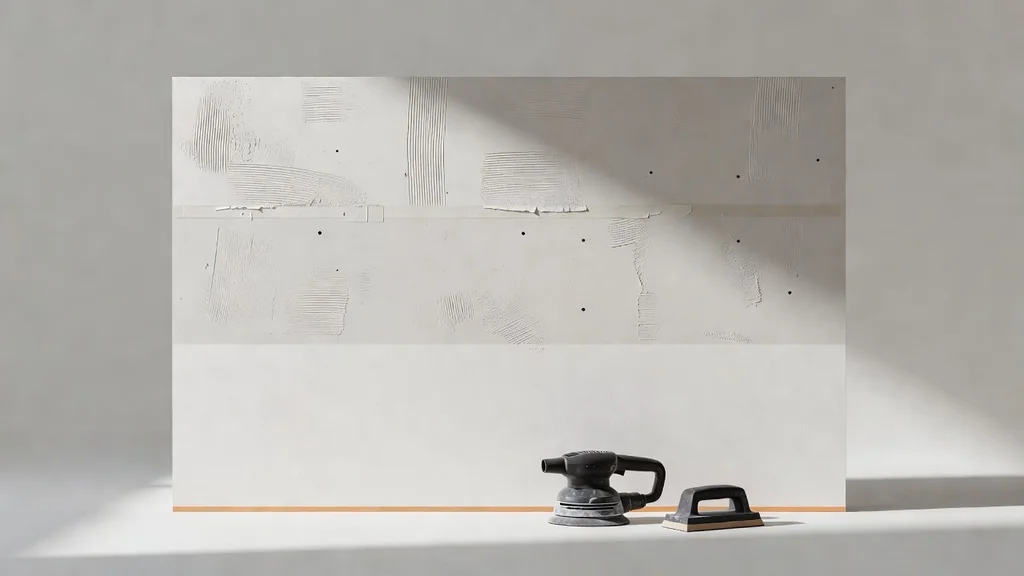
Overhead lighting shines toward the wall and can hide a broad hump. Sunlight, a wall sconce, or a lamp near the surface may later cast long shadows across the same joint.
Use a portable work light held at a low angle so the beam travels across the surface. Check vertically and horizontally. Move the light because one direction may conceal a defect that another reveals.
Look for:
- hard outer edges;
- ridges and tool chatter;
- hollow areas between coats;
- pinholes and scratches;
- a joint that is wider on one side than the other;
- texture edges around a repair;
- transitions near corners, trim, and ceilings.
Critical lighting does not mean every microscopic mark must be chased. Evaluate the finish level, planned texture, primer, paint sheen, color, and normal viewing conditions together. The Gypsum Association’s finish levels provide a common way to set expectations before decoration.
Mistake 7: Letting Dust Escape the Work Area
Drywall sanding produces fine airborne dust that can settle far beyond the joint. Some joint compounds contain respirable crystalline silica as a trace ingredient, while formulas and hazards vary. The product safety data sheet is the right source for that specific material.
A responsible dust plan can include:
- removing unnecessary furniture and belongings;
- covering floors and fixed surfaces;
- isolating the work zone from occupied areas;
- managing HVAC openings without creating an unsafe ventilation condition;
- using vacuum-assisted sanding equipment designed for drywall;
- using a suitable vacuum and filter configuration specified for the equipment;
- wearing eye protection and product-appropriate respiratory protection;
- cleaning with capture methods instead of dry sweeping dust back into the air.
NIOSH testing has shown that evaluated vacuum sanding systems can greatly reduce drywall dust exposure. That does not make them dust-free. Hoses leak, filters load, seals fail, and hand details still release material.
Utah Drywall & Repair uses tarps and protection when dust containment is required. For an occupied home or active commercial space, containment should be part of the scope, not an afterthought.
Safety: Review the current safety data sheet for the exact compound. Follow its ventilation, eye-protection, and respiratory-protection instructions. Occupational work may require an employer exposure assessment and a compliant respiratory-protection program rather than a casual mask choice.
Mistake 8: Ignoring Lead Paint or Suspect Asbestos Materials
Sanding new joint compound is different from sanding through an old painted or textured surface. Renovation can disturb lead-based paint in pre-1978 housing and child-occupied facilities. Paid renovation work that falls under EPA’s Renovation, Repair and Painting Rule has specific certification and work-practice requirements.
Some older ceiling textures and other building materials may contain asbestos. Appearance cannot confirm it. EPA recommends testing suspect material when it is damaged or a renovation will disturb it. Stop and investigate before sanding, scraping, drilling, or cutting an unknown older material.
These issues are not solved by adding a dust bag to a sander. They require the correct assessment, containment, work practices, and waste handling.
Mistake 9: Assuming Wet Sanding Solves Everything
A damp drywall sponge can smooth small areas of compatible drying-type compound with less airborne dust. It can be useful near finished surfaces or for minor ridges. It also has tradeoffs.
Wet sanding can:
- soften and move compound rather than cut it flat;
- round corners or create waves if pressure is uneven;
- smear a joint when the sponge is too wet;
- add moisture to the surface;
- take too long for large areas;
- produce a different surface profile than dry sanding.
Use clean water, wring the sponge thoroughly, and follow the compound manufacturer’s guidance. Setting compounds vary in hardness and sandability, so a technique suitable for one product may not work on another.
Mistake 10: Sanding Without a Stop Point
More sanding does not always mean a better finish. Once the joint is smooth, edges are feathered, and defects are corrected, continued sanding increases the chance of damage.
Use this stop-check:
- The surface is fully dry.
- No hard ridge catches the knife or hand.
- The transition looks gradual under angled light.
- Tape and face paper remain covered and intact.
- Low spots have been filled rather than hollowed out.
- Dust is removed without wetting or damaging the surface.
- The finish is appropriate for the planned texture and paint.
Then apply an appropriate drywall primer. Primer helps equalize porosity and makes small defects easier to see, but it is not a filler. Correct scratches, pinholes, or raised edges before finish paint.
Hand Sanding, Vacuum Sanding, and Wet Sanding
| Method | Useful for | Advantages | Limits |
|---|---|---|---|
| Hand sanding block or sponge | Small repairs, corners, and controlled detail work | Simple and tactile | Slow and dusty without capture; uneven pressure can dish the surface |
| Pole sanding | Broad walls and ceilings | Extends reach and keeps strokes long | Head can flip; overhead work is tiring; dust control is still required |
| Vacuum-assisted hand or power sanding | Larger finishing areas when paired with suitable extraction | Captures dust near the source | Equipment setup, maintenance, and technique are critical |
| Damp sponge finishing | Small compatible areas where airborne dust must be limited | Very little airborne sanding dust | Can smear or wave the surface and is not efficient for broad flattening |
No method replaces good compound application. Choose based on surface size, product instructions, room occupancy, access, and the finish expected.
Ceiling and High-Wall Sanding
Overhead sanding adds falling dust, fatigue, balance, and access hazards. A tired worker presses unevenly and loses control of the pole head. Ladders also create risk when the work requires reaching sideways or applying force.
Use stable access equipment appropriate to the height and task. Keep both feet supported, reposition instead of overreaching, and take breaks before technique deteriorates. Wear eye protection. If the ceiling is loose, stained, bulging, or sagging, stop and investigate before sanding.
The ceiling repair service is a better fit when the issue involves damaged board, access openings, texture transitions, or uncertain attachment rather than a simple finishing touch-up.
When to Hand the Finish Off
A professional finisher may save rework when the project has long butt joints, smooth ceilings, strong natural side light, dark or glossy paint, a large occupied area, or a previous finish that is already overbuilt. The same is true when dust containment matters around furniture, tenants, customers, or operating equipment.
Utah Drywall & Repair has more than 20 years of drywall experience and performs proper finishing, texture work, and paint matching. Use drywall finishing services for larger surfaces or the estimate request to send photos and scope details.
Frequently Asked Questions
What grit should I use for drywall sanding?
Use the compound and tool manufacturer’s recommendation. Start with the least aggressive abrasive that corrects the defect in a test area. Very coarse abrasive can leave deep scratches quickly.
Can I sand joint compound the same day it is applied?
Only if the selected product and actual conditions allow it. Setting time does not always mean the material is dry enough to sand or decorate. Follow the current product instructions.
Why does my sandpaper clog immediately?
The compound may still be damp, the abrasive may be too fine for the defect, or the surface may contain soft paint or contamination. Stop and identify the cause rather than pressing harder.
Is vacuum sanding dust-free?
No. Effective source capture can reduce dust substantially, but equipment condition, filters, seals, hand work, and cleanup all affect exposure.
Will primer hide sanding scratches?
Primer can equalize porosity and reveal defects. It does not reliably fill scratches, gouges, ridges, or exposed paper. Repair those before finish paint.
Resources and References
- NIOSH: Control of Drywall Sanding Dust Exposures
- NIOSH Engineering Controls Database: Drywall Sanding
- OSHA: Types of Construction Work Excluded From the Silica Standard
- USG Sheetrock Easy Sand Setting-Type Joint Compound Safety Data Sheet (PDF)
- US EPA: What the Renovation, Repair and Painting Rule Requires